Air-Dry Clay Pumpkins: 15 Ways to Style Them From Farmhouse to Modern
JenniferDawn
Air-dry clay pumpkins are the fall craft that quietly took over Pinterest, and honestly, it’s easy to see why. They cost almost nothing to make, they don’t rot on your mantel like real pumpkins do, and the moment you finish one, you already know you’re making twelve more. Whether your home leans white-linen farmhouse or matte-black modern, there’s a clay pumpkin style waiting for you — and this post walks you through fifteen of them, in order from cozy country to clean and sculptural.
This post contains affiliate links, which means I may earn a small commission at no extra cost to you if you purchase through them. I only recommend products I genuinely use and love.
Air-dry clay has been my quiet obsession for years. There’s something about pulling a plain block of clay out of the bag and knowing that in a few hours it can become anything — a plate, a ring dish, a wall hanging, a whole mantel full of sculpted pumpkins. That’s the beauty of the medium: one afternoon of shaping and a few pots of paint can carry you into any aesthetic you want, from layered farmhouse with dried wheat and brass candlesticks to a pared-back modern shelf with nothing but two matte-black shapes on it. Both work. Both come from the same lump of clay.
Pumpkins are one of my favorite ways to play with styling because they’re so forgiving. The shape itself is iconic enough that even a wobbly first attempt reads as intentional, which means you get to focus on the fun part — the finish. If you’re brand-new to the medium, my beginner’s guide to air dry clay will walk you through the basics before you dive into the styling side.
Grab a mug of something warm and let’s get into the fifteen.
What Makes Air-Dry Clay Perfect for Pumpkin Season
Before we hit the styles, a quick word on why air-dry clay is the ideal material for fall decor specifically. Real pumpkins are gorgeous for about eleven days before they turn into a science experiment on your porch. Ceramic pumpkins from the home store cost twenty-eight dollars a piece and all look identical to the neighbor’s set. Air-dry clay pumpkins solve both problems: they last for years, they’re completely customizable, and one two-pound block will make you a full mantel display for under fifteen dollars.
They also take paint beautifully. Chalk paint, acrylic, milk paint, gold leaf, even nail polish for the tiny details — clay drinks it all in. And because you’re sculpting them by hand, no two are ever identical, which is exactly the look most farmhouse and modern styling is trying to fake with expensive store-bought decor.
If you’re not sure how to make the base pumpkins themselves, my homemade air dry clay recipe post has the base recipe I use, and you can shape it around a small crumpled ball of foil to save clay on larger pumpkins.
Farmhouse Air-Dry Clay Pumpkins
The farmhouse end of the spectrum leans warm, textural, and layered. Cream, oatmeal, sage, terracotta, dried florals, natural wood stems, hemp twine. These are the pumpkins that look like they belong on a chippy white mantel next to a stack of vintage books.
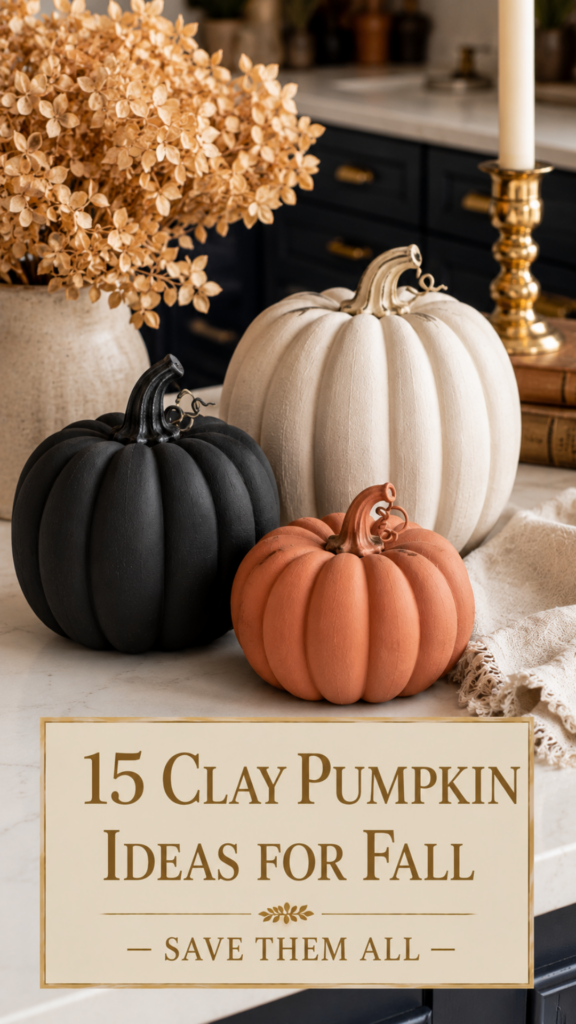
1. Whitewashed Heirloom Pumpkins
The classic. Sculpt your air-dry clay pumpkin with deep ribbing using a butter knife or bone folder, let it fully dry, then paint it in a matte cream base. Once that layer is dry, water down a small amount of warm gray or taupe paint and brush it into the ribs, wiping the ridges clean with a dry cloth. The result looks exactly like an aged, sun-faded heirloom pumpkin from a farm stand. Group three in different sizes on a linen runner and you are done.
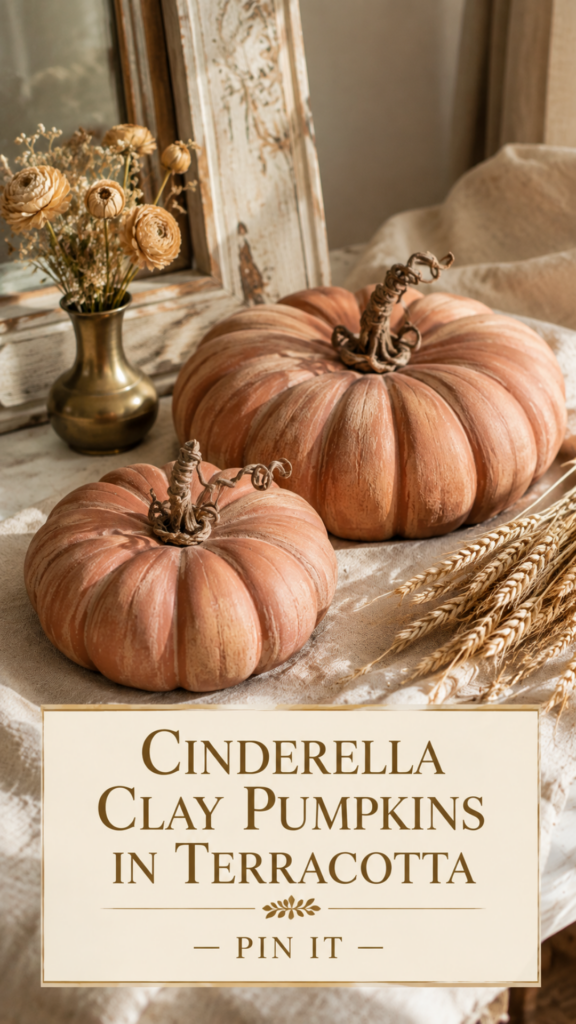
2. Cinderella Pumpkins in Warm Terracotta
Cinderella pumpkins are the flatter, wider variety with pronounced deep ribs — think French country cookbook. Shape yours short and squat, exaggerate the ribbing, and paint in a warm terracotta base with a soft blush wash pulled through the ribs. Add a curly grapevine stem hot-glued into the top hole. These look extraordinary next to dried wheat bundles.
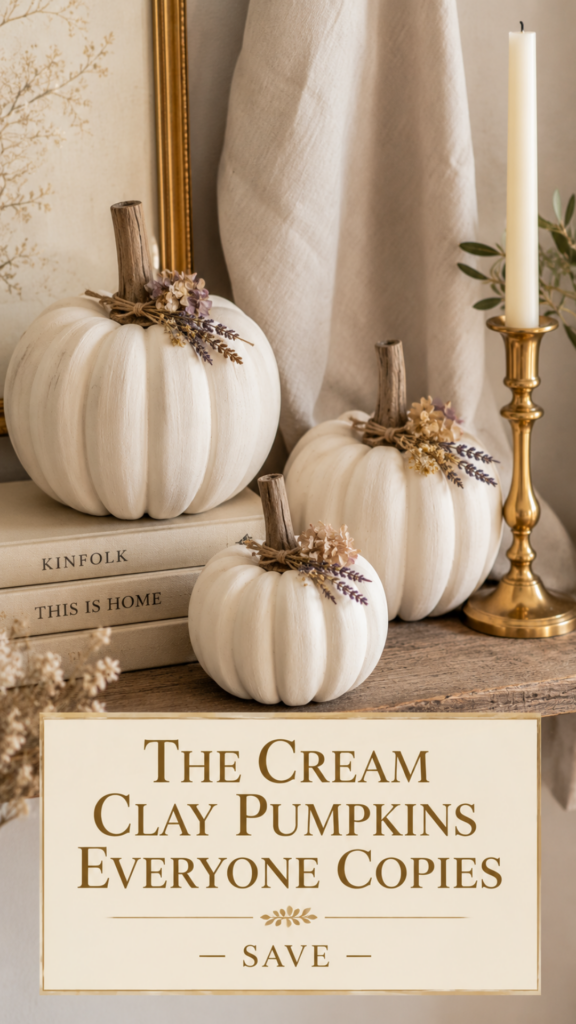
3. Cream Pumpkins With Dried Florals
This is my personal favorite every single year. Simple cream matte pumpkins, no distressing, no wash — just clean and quiet. What makes them farmhouse-perfect is what you tuck around the stem: dried lavender, chamomile, ranunculus, tiny bundles of hydrangea. A little hot glue and a length of jute twine hides the mechanics. They read expensive because they look styled, not painted.
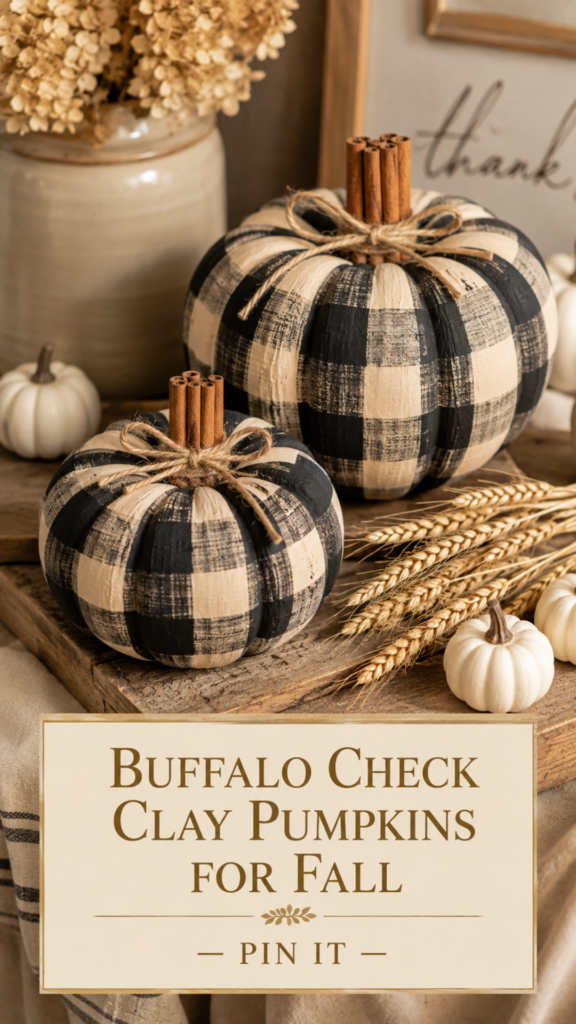
4. Buffalo Check Painted Pumpkins
Buffalo check is farmhouse shorthand at this point. Paint your dried clay pumpkin in a cream base, then use a small square sponge and black craft paint to grid on the check pattern. Go slow, use painter’s tape as a guide if you need it, and don’t worry about perfection — the handmade wobble is what makes it charming. A twine bow around the wooden stem finishes it.
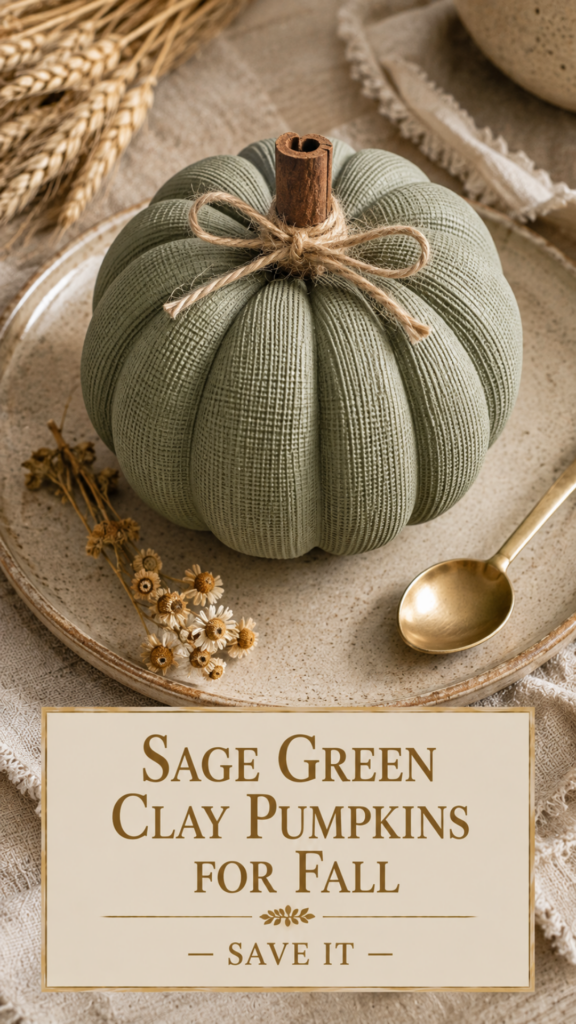
5. Sage Green Textured Pumpkins
Sage is doing a lot of heavy lifting in modern farmhouse styling right now, and it looks incredible on clay. Press linen fabric into the wet clay before it dries to leave a subtle woven texture across the surface, then paint in a muted sage. Finish with a real cinnamon stick as the stem, secured with a wrap of natural hemp. These photograph beautifully for Pinterest, which is a nice bonus.
.
Cottage and Vintage Clay Pumpkin Ideas
Bridging farmhouse and the more decorated end of the spectrum, these lean into aged finishes and metallic accents.
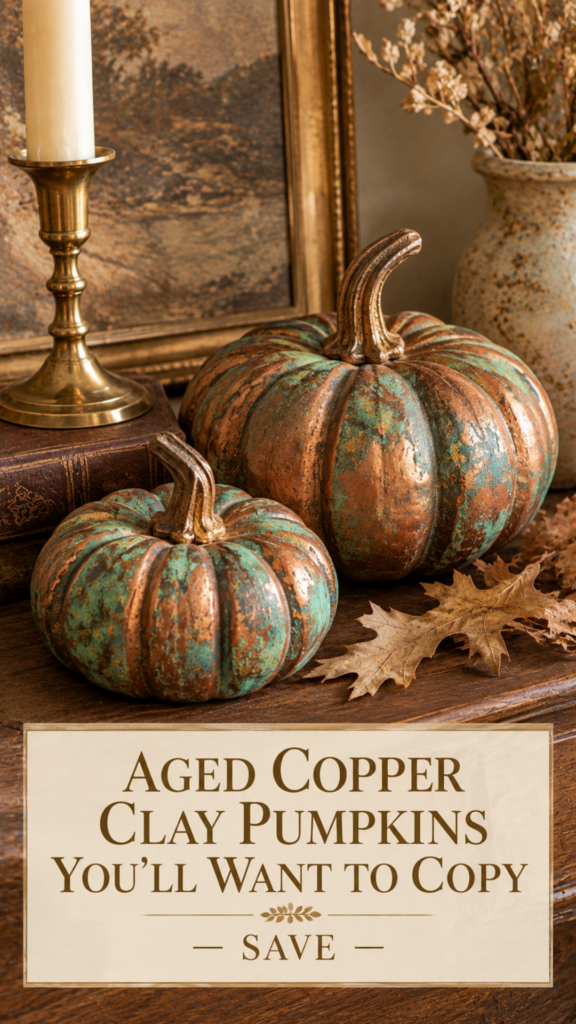
6. Aged Copper Patina Pumpkins
These look like they were pulled out of a European antique shop. Base your dried pumpkin in a matte copper acrylic, then dab a mix of teal and sage patina paint over the surface with a sea sponge, letting the copper show through in high spots. The finished look is jewel-toned, moody, and impossible to buy for under sixty dollars at a home store.
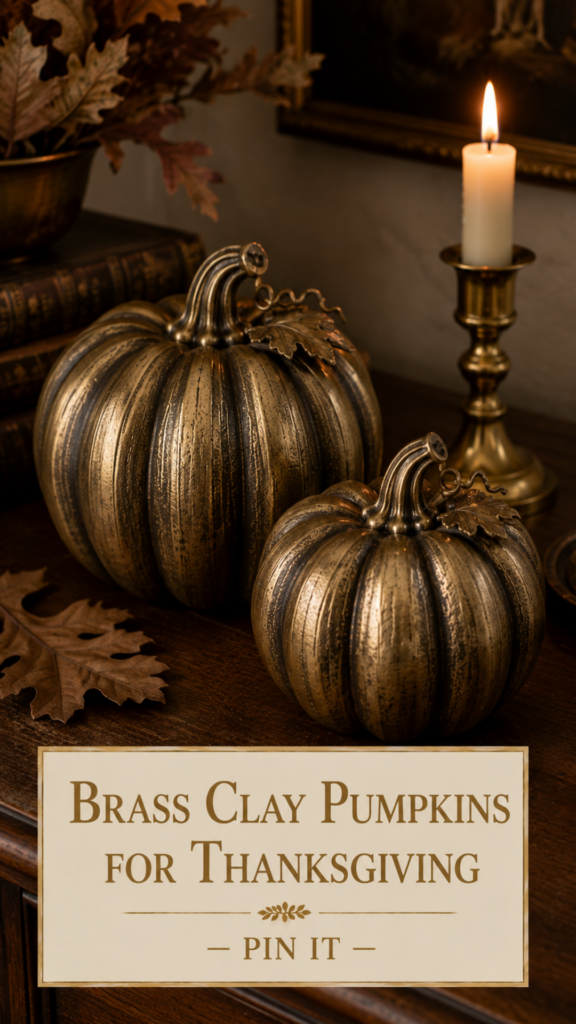
7. Vintage Brass-Look Pumpkins
Similar technique, different mood. Paint the pumpkin in a deep antique gold, then rub a small amount of dark brown wax or watered-down black paint into the crevices to age it. Buff the raised areas back to bright gold. These pair beautifully with real brass candlesticks and cream tapers — deeply cozy for a Thanksgiving table.
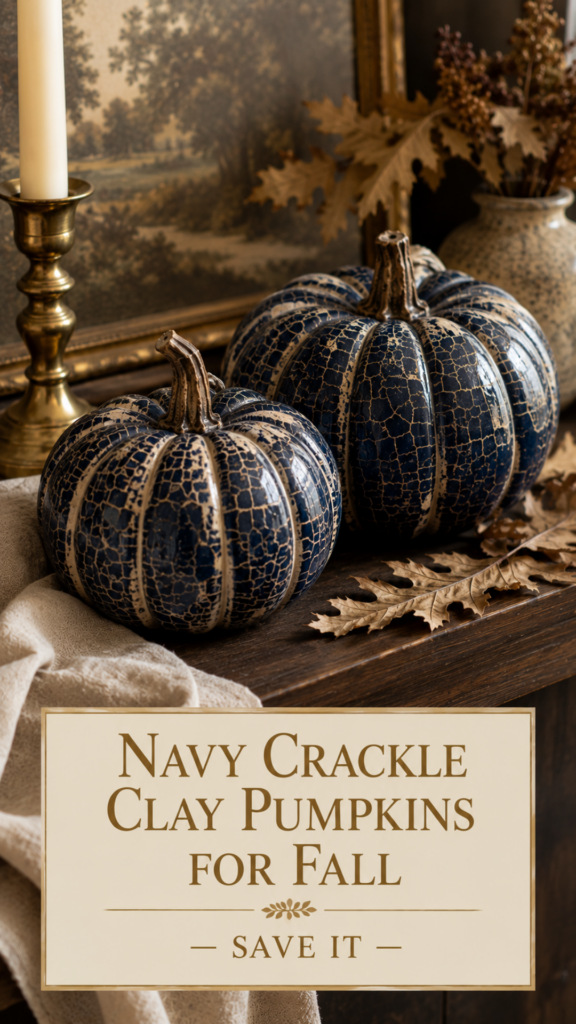
8. Crackle Glaze Pumpkins
Crackle medium is one of the most underused craft supplies for the money. Paint your pumpkin in a base color (deep navy works stunningly), coat with crackle medium, then top with a contrasting color (warm cream). As the top layer dries, it cracks to reveal the base — instant hundred-year-old finish. Group with real dried oak leaves.
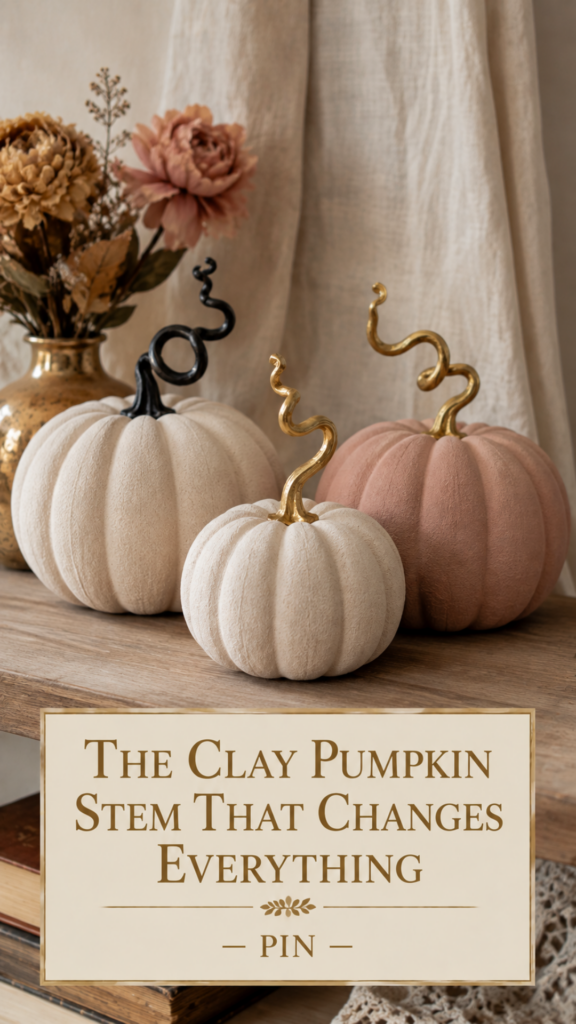
9. Two-Tone Stem Pumpkins
The trick here isn’t the pumpkin body — keep that simple cream or dusty rose. It’s the stem. Instead of a plain wooden or clay stem, use a real dried curly willow branch or a piece of grapevine, and paint just the tip in matte black or brushed gold. Small detail, big personality shift. It reads intentional and designed rather than crafty.
Boho and Eclectic Clay Pumpkin Styles
Now we’re moving toward the modern end, but with pattern and personality still in play.
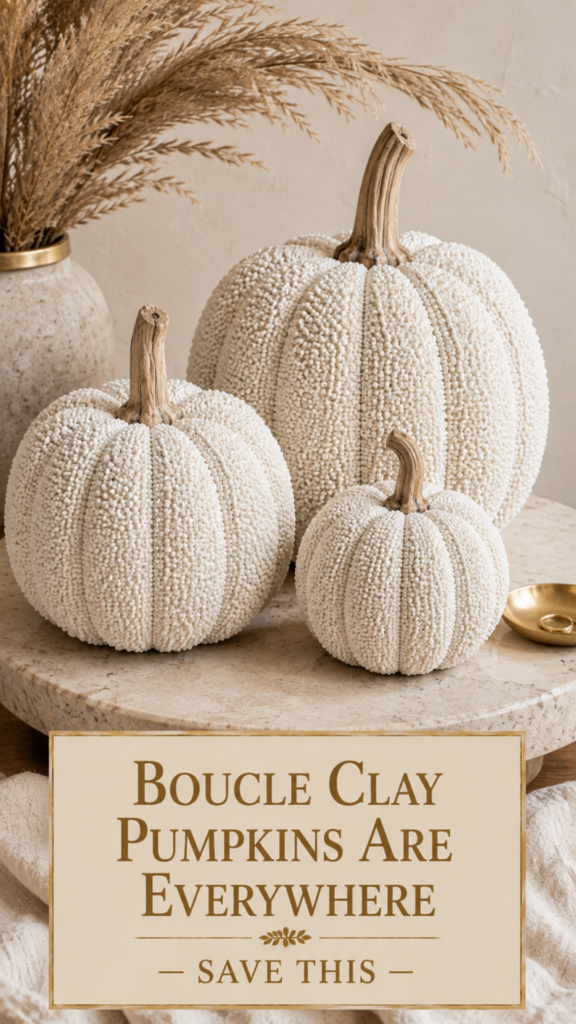
10. Boucle-Texture Piped Pumpkins
This one is having a real moment. Instead of smoothing your clay surface, use a small piping bag or a plastic sandwich bag with the corner snipped and pipe tiny dots or spirals all over the pumpkin body while it’s still wet, mimicking that nubby boucle fabric texture that’s all over furniture right now. Paint in bone white. It looks like a sculpted linen accessory rather than a craft.
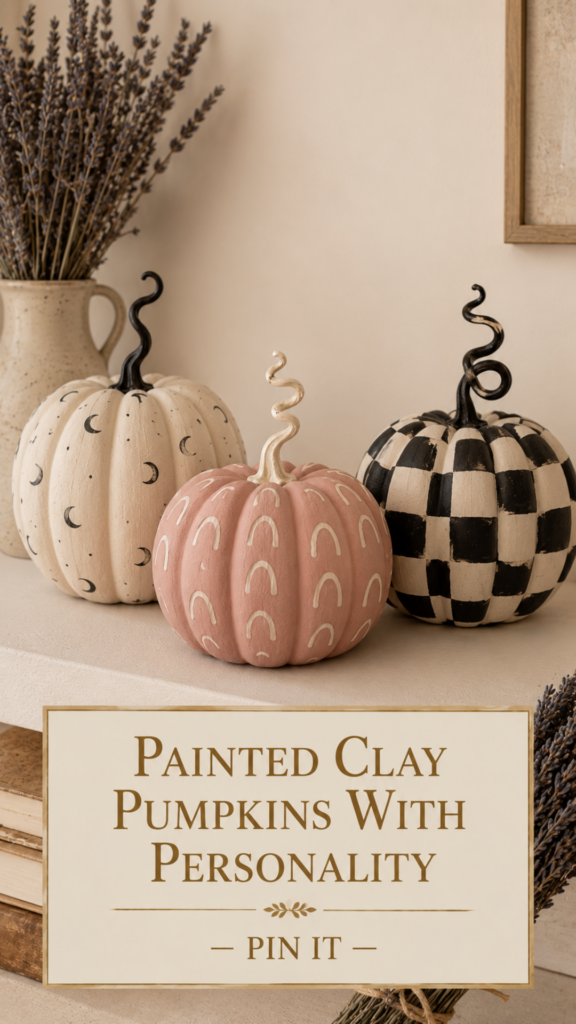
11. Painted Pattern Pumpkins
Take a plain matte pumpkin and freehand a simple pattern in one contrasting color: small crescent moons, tiny stars, arches, wavy lines, checkerboard. Keep the palette limited to two colors total. A cream pumpkin with black moons is witchy and modern at once. A dusty pink pumpkin with cream arches is boho boutique. This is where your personal aesthetic can really show up.
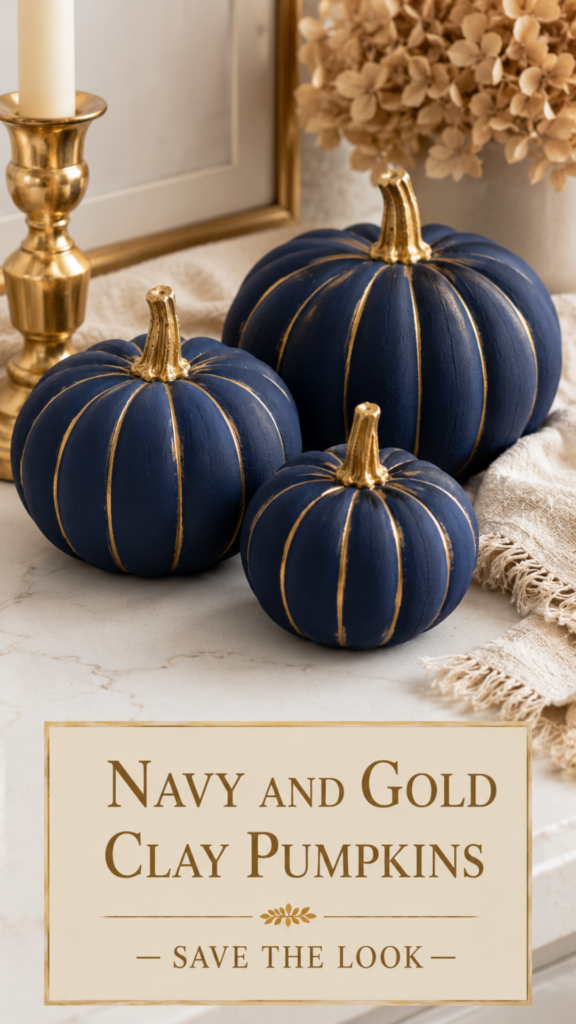
12. Metallic Gold and Navy Pumpkins
Navy and gold is a signature pairing that never reads as trendy — it reads as intentional. Paint the pumpkin body in deep matte navy, then hand-paint thin gold vertical lines following the ribbing. Finish with a gilded gold stem. These are the pumpkins you keep out well past October because they honestly work as year-round decor.
Modern Air-Dry Clay Pumpkins
The modern end of the spectrum is where clay pumpkins get sculptural. Fewer of them, larger, cleaner. Restraint is the design principle.
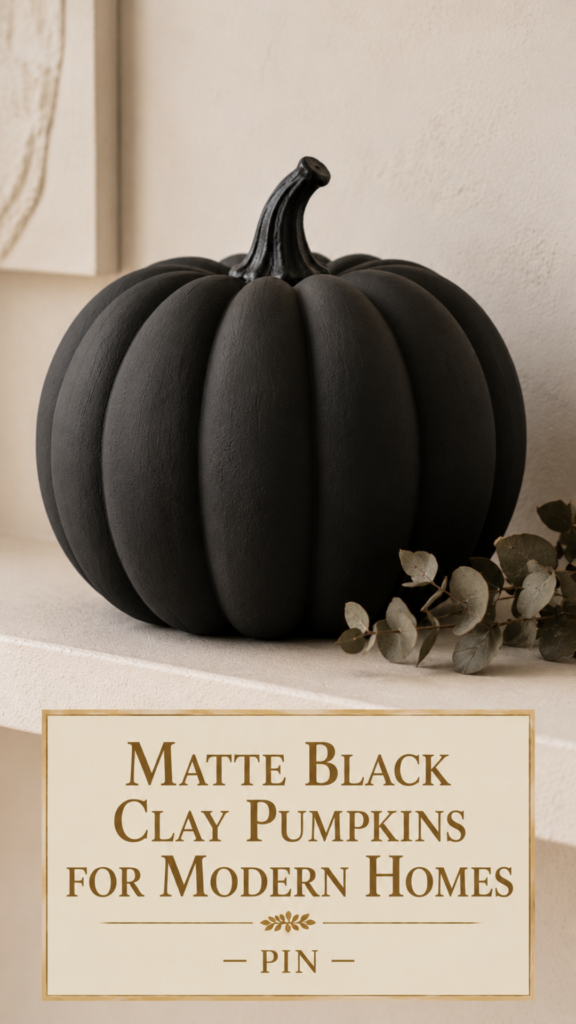
13. Matte Black Sculptural Pumpkins
Two things make a matte black clay pumpkin work: the finish has to be truly matte (no shine), and the pumpkin has to be either very large or very small — nothing in between. Chalk paint gives the best matte finish. Shape one big statement pumpkin and place it alone on a floating shelf. That’s it. That’s the whole styling.
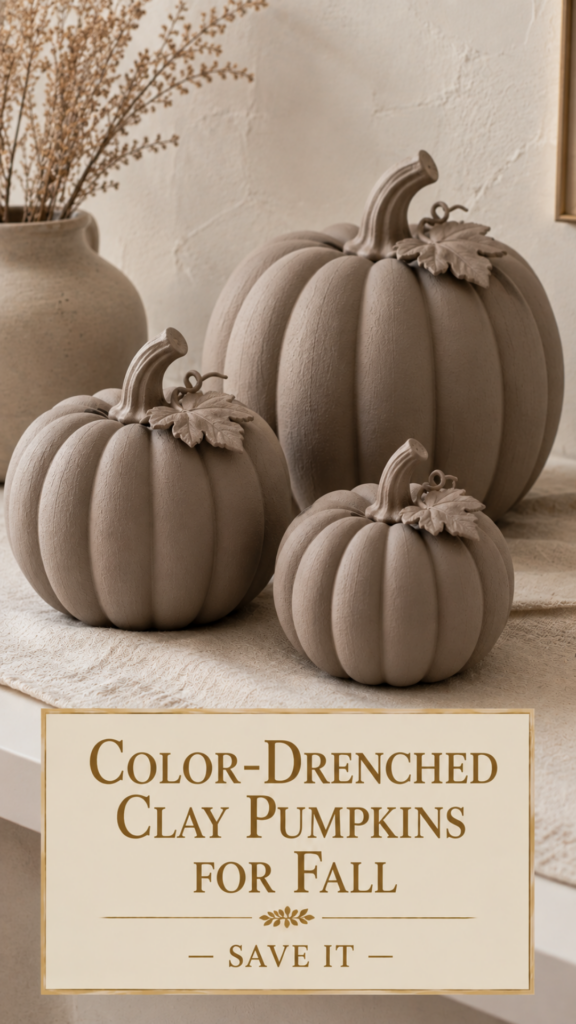
14. Color-Drenched Monochromatic Pumpkins
Color drenching — where the body, stem, and even the leaves are all painted the exact same shade — is one of the strongest modern decor moves. Try a dusty rust, a muted olive, a warm bone, or a soft mushroom. Because there’s no contrast, the sculptural shape of the pumpkin becomes the whole point. Group three in graduated sizes in the same shade.
15. Ribbed Ceramic-Look Pumpkins
The final one, and one of my favorites. Sculpt your pumpkin with very deep, evenly spaced ribs, then paint in a matte off-white and finish with a barely-there satin sealer. The result reads as high-end ceramic — the kind you’d find at a design store for eighty dollars. Pair with a black clay pumpkin from style thirteen and one warm terracotta pumpkin from style two, and you’ve got a fully layered fall vignette that spans the whole aesthetic spectrum.
Apple Barrel Acrylic Paint Set (multipack) — for freehand pattern work, moons, arches, checkerboard
Rub ‘n Buff Metallic Finish (Antique Gold, Gold Leaf, European Gold) — the secret to vintage brass-look pumpkins
DecoArt Metallic Acrylic Paint (Copper, Antique Gold, Champagne Gold) — for gold vertical line details on navy and gold pumpkins
Martha Stewart Crackle Medium — for the navy crackle pumpkins
Briwax Dark Brown Wax — rubbed into ribs for aged brass and copper patina finishes
Fine Detail Paint Brush Set — for painted moons, arches, and hand-painted stripes
Foam Sponge Brush Set — for base coats and washes
Sea Sponge Set — for aged copper patina and buffalo check texture
Sealing & Protection
Mod Podge Matte Sealer — locks in matte finishes without shine
Krylon Satin Clear Sealer Spray — for the barely-there satin finish on ceramic-look pumpkins
DecoArt Americana Gloss Varnish — if you want a high-shine option on any style
Aleene’s Original Tacky Glue — for hemp twine, cinnamon sticks, and dried florals
Stems & Natural Elements
Real Cinnamon Sticks (bulk pack, 8-inch) — natural stems for farmhouse pumpkins
Dried Curly Willow Branches — for two-tone stem pumpkins and modern styling
Grapevine Wreath Curls (loose vine) — for Cinderella pumpkin stems
Dried Wheat Bundle — styling for farmhouse vignettes
Dried Pampas Grass — for boucle and ceramic-look styling shots
Dried Lavender Bundle — for cream pumpkin florals
Dried Chamomile Stems — for the styled cream pumpkin florals
Dried Hydrangea (cream and dusty pink) — for luxe styling
Dried Eucalyptus Bundle — modern minimalist styling
Styling & Display Props
Natural Linen Table Runner (oatmeal, cream, or flax) — under every farmhouse vignette
Cream Linen Napkin Set — layered under pumpkin groupings
Brushed Gold Taper Candlesticks (set of 3, graduated heights) — anchor pieces for luxe styling
Real Brass Candlesticks (vintage-style) — for the Thanksgiving brass-look pumpkin pairing
Cream Unscented Taper Candles (pack of 12) — pair with brass candlesticks
Battery-Operated Flickering Taper Candles — safe alternative for lit displays
White Quartz Serving Board — background surface for luxe styling shots
Natural Wood Cutting Board or Slice — rustic farmhouse styling
Cake Stand or Small Pedestal (cream or wood) — for varying heights in groupings
Nice-to-Have Extras
Gold Leaf Sheets (imitation gold leaf kit) — for gilded stem tips and accent details
Painter’s Tape (fine line, ¼-inch) — for clean buffalo check and pattern lines
Craft Apron — clay is messy, this saves your favorite sweater
Wax Paper Roll — for clean workspace and stopping clay from sticking
Tips for Displaying Your Clay Pumpkins
A few things I’ve learned over years of styling these:
Group in odd numbers. Three, five, seven. A pair of pumpkins looks like you couldn’t decide; three looks styled.
Vary the heights. Stack books, use a cake stand, tuck one on a lower shelf. Flat-line displays lose all their charm.
Layer textures underneath. A linen runner, a wooden board, a slice of tree trunk, a piece of moody stone. The surface matters as much as the pumpkin.
Add something living or dried. Real dried grasses, eucalyptus, wheat, or a small live mum plant next to the display grounds it and stops the clay from looking too crafty.
Light matters. A single warm-toned candle nearby transforms a shelf. Battery-operated flickering tapers work beautifully and are safe to leave lit for hours.
How to Make Your Clay Pumpkins Last for Years
The single biggest mistake people make with air-dry clay pumpkins is skipping the sealing step. Unsealed air-dry clay is porous and fragile — it can absorb humidity, chip at the edges, and dull over time. A proper sealer locks in your paint and gives you decor that legitimately lasts a decade. My full how to seal air-dry clay guide walks through which sealers work best for which finishes (matte, satin, or high-gloss) and how to apply them without ruining your paint job.
Store your finished pumpkins in a covered box in a dry space — not a damp basement — and they’ll come out looking exactly the same next October.
Ready to Style Your Own Clay Pumpkin Collection
Fifteen styles, one very forgiving medium, and endless variations once you start mixing techniques. The best part about making your own clay pumpkins is that you’re never locked in — repaint them next year, add a wash, swap the stem, retire one to storage and pull it out again in three years when it feels fresh. That kind of flexibility is exactly why so many of us keep coming back to clay season after season.
If you’re feeling inspired to build out a whole fall clay project run, my 25 fall air-dry clay projects roundup is the natural next stop — ghosts, leaf bowls, s’mores coasters, and plenty more to keep you crafting through October.