
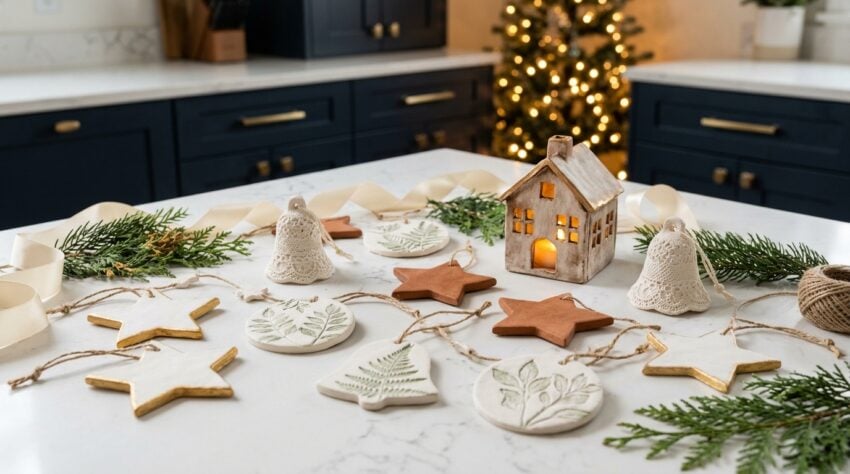
Some of the prettiest Christmas decorations I own came from a single block of air dry clay and a quiet afternoon. These 25 Christmas air dry clay projects look like they came from a holiday boutique, but every one is simple enough to make at your kitchen table, with no kiln, no oven and no experience needed.
Quick heads-up: this post contains affiliate links. If you buy something I recommend, I may earn a small commission at no extra cost to you, which I will absolutely spend on more clay and gold paint. Santa’s workshop doesn’t stock itself. As an Amazon Associate I earn from qualifying purchases.
Below you’ll find clay Christmas ornaments, a glowing clay Christmas village, garlands, scented cinnamon stars and handmade gifts, each with clear instructions and a tip to make it look boutique-bought. I’ve also included the basic method every project uses, the supplies I rely on, and how to seal your pieces so they last for years.
Boutique-look clay in 3 moves
- Add texture. Lace, stamps, greenery and doilies pressed into soft clay make simple shapes look expensive.
- Keep the palette soft. White, ivory, sage and blush with gold or pearl edges always looks high-end.
- Finish it properly. Sand the edges, then seal every piece so it looks crisp and lasts for years.
Supplies for Christmas Air Dry Clay Projects
You only need a few basics to make every project on this list. The rest is ribbon, paint and imagination. If you’re not sure which clay to buy, my guide to the best air dry clay for crafts and ornaments compares the top brands.
Your Christmas clay kit
- White air dry clay (a smooth, fine clay gives the cleanest look)
- A rolling pin with thickness guides
- Cookie cutters in stars, hearts, bells and trees
- Texture tools like lace, doilies, stamps and greenery
- A straw or skewer for hanging holes
- Fine sandpaper or a sanding sponge
- Acrylic paint in white, ivory and sage
- Metallic gold paint and pearl pigment powder
- A sealer like matte varnish or Mod Podge
- Jute, satin ribbon and clear fishing line
My Christmas Clay Craft Supplies
The clay, cutters, stamps, gold paint and ribbon I use for every project on this list.
SHOP CHRISTMAS CRAFT SUPPLIES
How to Make Air Dry Clay Christmas Decorations: The Basic Method
Almost every project below uses the same simple method. Learn it once, and you can make any shape you like.

The method behind every project
- Knead. Knead the clay for 1 to 2 minutes until smooth. Keep the rest wrapped so it doesn’t dry out.
- Roll. Roll the clay between two sheets of parchment to an even 6 mm (1/4 inch) thick.
- Texture. Press in lace, stamps or greenery now, while the clay is soft.
- Cut and pierce. Cut your shapes and poke a hanging hole with a straw, at least 6 mm from the edge.
- Dry slowly. Dry flat on a rack for 24 to 72 hours, flipping every few hours on the first day so they don’t curl.
- Finish. Sand the edges, paint, then seal with 2 to 3 thin coats.
Air Dry Clay Christmas Ornaments
Clay Christmas ornaments are the easiest place to start, and they’re the projects people always ask about. Each one takes about 15 minutes of hands-on time.

1Handmade Clay Star Ornaments
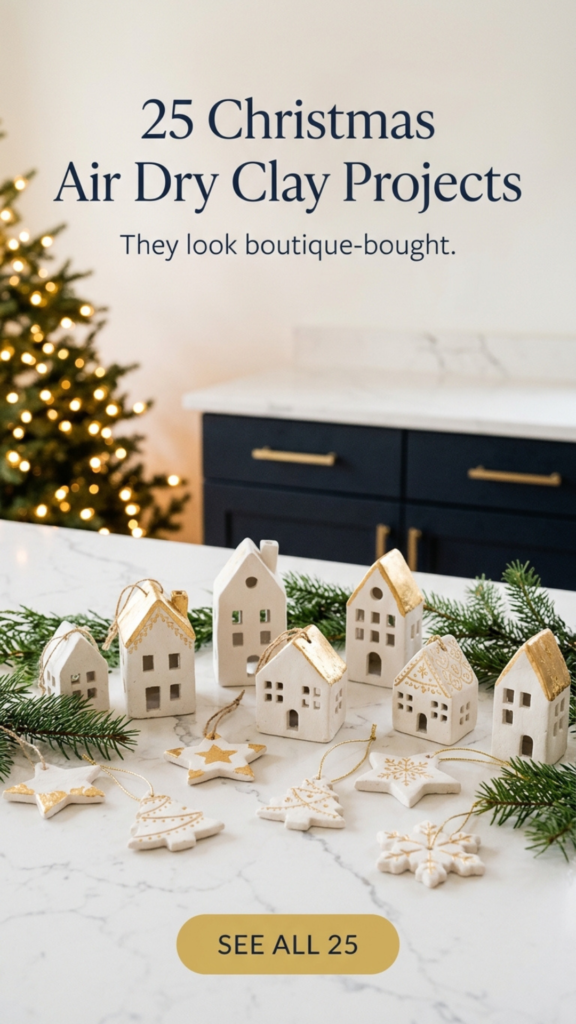
Cut stars from clay rolled 6 mm thick, press in a little texture, and add a twine hole. Once dry, brush the edges with gold or pearl paint. Tip: mix a pinch of metallic pigment into your paint for extra shimmer.
2Botanical Impression Ornaments
Roll cedar, rosemary or holly into the clay, peel it away, and cut circles around the print. Brush the raised areas lightly with metallic paint. Tip: silver over evergreen prints looks frosty and elegant.
3Embossed Snowflake Medallions
Stamp a snowflake into clay circles, add a hole, and dry flat. Hang with clear fishing line so they look like they’re floating. Tip: dust with iridescent powder for a frosted finish.
4Textured Lace Clay Bells
Press lace or a paper doily into the clay, cut bell shapes, and dry. Finish with a soft metallic paint. Tip: hang three in a cluster at different lengths.
5Clay Reindeer Ornaments
Cut reindeer with a cookie cutter, then paint them or leave them natural white. Thread ribbon through the top. Tip: glue on a tiny red rhinestone nose for a playful touch.
6Nativity Silhouette Ornaments
Trace or cut simple nativity shapes, dry them flat, and paint in soft neutrals. Tie with natural ribbon. Tip: leave them unpainted for a modern, all-white look.
Dry ornaments under a light cutting board or between two cooling racks. A little weight keeps them perfectly flat while they dry.
Hanging Clay Christmas Decorations
These pieces are made to dangle from branches, windows and wreaths, catching the light all season.
7Clay Heart Ornaments with Quotes
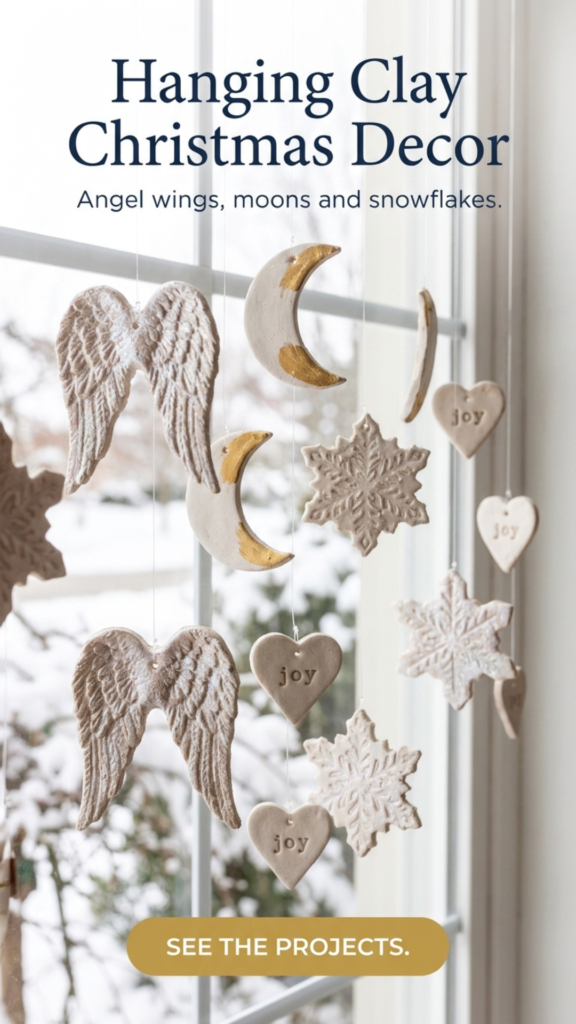
Cut hearts and stamp a short word like “joy,” “noel” or “peace.” Paint just the edges once dry. Tip: metallic ink pads make the words stand out beautifully.
8Clay Angel Wings
Shape wings by hand or with a feather cutter, and press in lace for texture. Dust with pearl pigment once dry. Tip: make a pair as a memorial ornament for a loved one.
9Layered Air Dry Clay Snowflakes
Cut snowflakes in two sizes and glue a small one on top of a large one for depth. Dust with metallic powder. Tip: hang them in a window so the light catches them.
10Boho Moon Phases Ornament Set
Cut full, half and crescent moons, paint them white and gold, and string them in lunar order. Tip: add crystal beads between each moon.
11Mini Stocking Clay Charms
Cut tiny stockings, paint red and white cuffs, and tie them to gifts, wreaths or your tree. Tip: sprinkle fine glitter on while the paint is still wet.
Clay Christmas Village and Tree Projects
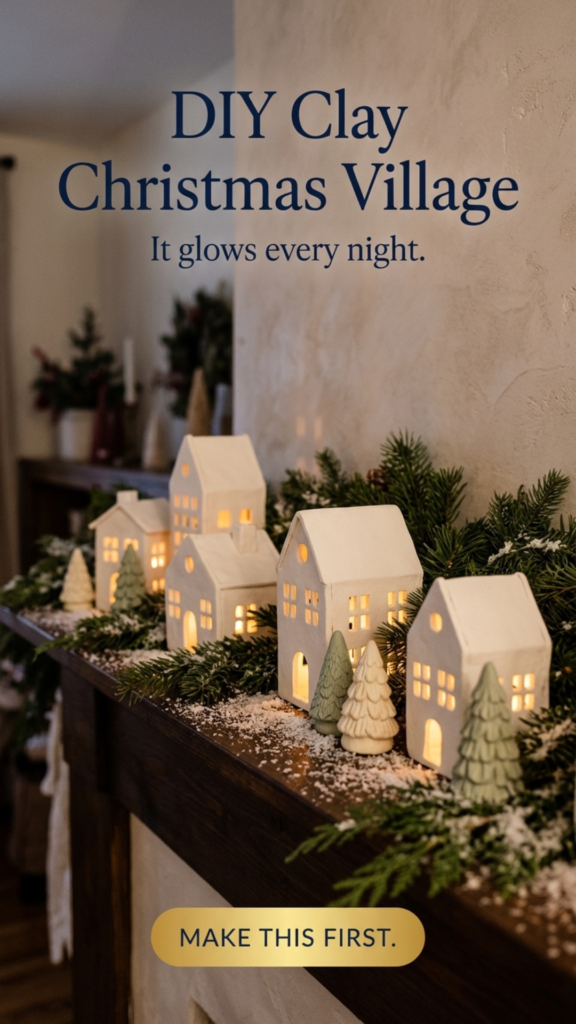
A little clay Christmas village glowing on a shelf or mantel is pure magic, and it’s one of the most-saved Christmas clay ideas on Pinterest.
12Clay Snow Village Tea Lights
Build small hollow houses from clay slabs, cut out the windows, and dry for 2 to 3 days. Place a battery LED tea light inside. Tip: knead a little cinnamon into the clay for a cozy scent.
13Scandinavian Christmas Houses
Cut flat house shapes, etch the doors and windows, and dry. Paint the windows white and set fairy lights behind them. Tip: group 3 to 5 houses at different heights.
14Clay Gingerbread Village
Cut house shapes, dry them, and decorate with white paint pens to look like piped icing. Tip: add a touch of gold leaf to the roofs.
15Clay Christmas Village Ornaments
Sculpt tiny cottages and trees onto clay discs, then glue them to wood slices and paint the details. Tip: brush on faux snow or mica flakes.
16Mini Air Dry Clay Christmas Trees
Shape small cones by hand and snip or notch the surface for texture. Paint in sage, ivory or blush once dry. Tip: dry-brush white over the edges so they look snow-dusted.
If you only make one project, make the Clay Snow Village Tea Lights. They take one afternoon, glow beautifully every evening, and look like something from a high-end holiday shop. Always use battery LED tea lights inside, never real candles.
Clay Christmas Garlands and Scented Decor

17Air Dry Clay Christmas Garland
Cut a mix of stars, hearts and trees, pierce two holes in each, and string them on jute. Tip: alternate matte white shapes with gold-tipped stars.
18Cinnamon Clay Stars
Knead about 1 tbsp of ground cinnamon into every 250 g of clay, cut stars, and dry. They smell like Christmas for weeks. Tip: hang them in the kitchen on jute.
19Dried Orange and Clay Garland
Dry thin orange slices in a low oven, then alternate them with white clay stars on twine. Tip: tie in cinnamon sticks for a rustic, fragrant finish.
20Rustic Clay Tree Topper
Form a large star or angel about 1 cm thick, dry it fully, and mount it on a wooden dowel. Tip: seal with a clear coat so it holds up year after year.
Handmade Air Dry Clay Christmas Gifts
Clay gifts feel personal in a way store-bought presents never do. For even more ideas, see my favourite air dry clay gifts.

21Personalized Clay Gift Tags
Cut thin tags, stamp a name, punch a hole, and thread with ribbon. The tag becomes an ornament they keep. Tip: dip your alphabet stamps in gold paint first.
22Mini Clay Gift Dishes
Shape small dishes inside a lined ramekin, dry, and paint a gold rim. Perfect for rings. Tip: try my clay leaf bowls for a botanical version.
23Stamped Clay Coasters
Roll clay 1 cm thick, stamp a pattern, dry fully, and seal with several coats of varnish. Tip: they’re decorative, so pair them with a gift mug rather than daily use.
24Clay Candle Holders
Shape a small dish around a glass votive or metal taper insert, dry for 48 hours, and seal. Tip: air dry clay isn’t heat-safe, so always use the insert or an LED candle.
25Clay Snowman Figurines
Stack three clay balls, add a tiny hat and scarf, then dry and paint. Tip: tie on a real ribbon scrap scarf for extra charm.
Everything You Need for Christmas Clay
Clay, cutters, stamps, gold paint, LED tea lights and ribbon in one easy list.
SHOP MY CLAY LISTHow to Seal and Care for Clay Christmas Decorations
Sealing makes your decorations look finished and protects them from humidity while they’re packed away. My full guide on how to seal air dry clay walks through every option.
Keep them looking new for years
- Seal every piece with 2 to 3 thin coats, front and back
- Use LED lights only inside houses and holders
- Keep them dry. Air dry clay softens with water
- Wrap each piece in tissue when you pack them away
- Store in a dry spot, not a damp basement
- Touch up gold edges each year with a fine brush
Selling Your Air Dry Clay Christmas Decorations
Christmas clay ornaments are some of the best crafts to sell at holiday markets. They cost very little to make and look like boutique pieces. For pricing and display ideas, read my Christmas crafts to make and sell.

What sells best
- Sell ornaments in sets of 3 or 5 in a gift box
- Offer personalization with stamped names
- Display them on a small tree so buyers see them hanging
- Light up a clay village on your table to draw people in
- Add a care card saying they’re decorative and to keep them dry
- Bring gift-ready packaging with tissue and ribbon
Christmas Air Dry Clay FAQ
QWhat’s the best clay for Christmas ornaments?
A smooth, white air dry clay gives the cleanest, most boutique look. My air dry clay comparison shows which brands crack least.
QHow long does air dry clay take to dry?
Thin ornaments dry in 24 to 48 hours. Thicker pieces like houses and tree toppers can take up to 72 hours.
QHow do I seal air dry clay decorations?
Use 2 to 3 thin coats of matte varnish or Mod Podge, front and back, letting each coat dry first.
QCan I use real candles with air dry clay?
Not directly. Air dry clay isn’t heat-safe, so use battery LED candles, or a glass or metal insert for real candles.
QCan kids make these?
Yes. Stars, gift tags and garland shapes are perfect for kids. An adult should handle the craft knife.
QCan I sell air dry clay ornaments?
Absolutely. They’re low cost and popular at craft fairs. Seal them well and include a simple care card.
Final Thoughts
Handmade Christmas decorations carry something store-bought pieces never will: the quiet hours you spent making them. Pick one project, put on some Christmas music, and enjoy the process. For more ideas, see my 20 handmade air dry clay Christmas ornaments and polymer clay Christmas ornaments and earrings.
Save this for your holiday crafting. Pin it to your Christmas board so you can find it when you’re ready to create.
Jennifer Dawn

Hi!
I’m going to try making #4. What would you recommend using to seal those? I see a few options in your Amazon store. Thank you!
White Air dry clay, and a star stamp / cookie cutter like these https://amzn.to/3XtRhcD
Beautiful! What clay is your go-to?
I can’t really say I have a go to as I love to work with different mediums, but this one is is really good but not as economical https://amzn.to/4rHpmDW this one will give you more for your money. https://amzn.to/44e6HWh
Do you sell the clay ornaments?!
Not online but I do love to make for gifts , myself and the occasional craft show.
Hi is it okay for hot wax to melt on the candle holders? Any reactions with the sealant?
If you have done thin layers and allowed it to fully dry/cure, you should not have an issues.