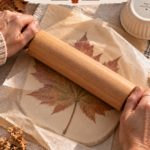
There’s something about the first cool morning of the season that makes me want to get my hands in clay, and clay leaf bowls are hands-down my favorite way to bring that feeling into my home. You press an actual fall leaf into rolled air dry clay, shape it over a small bowl while it’s still soft, and let it dry into a delicate little dish with every vein and ripple of the real leaf pressed into the surface. No pottery wheel, no kiln, no fancy tools — just clay, a leaf from your yard, and an afternoon.
This post contains affiliate links, and as an Amazon Associate I earn from qualifying purchases — at no extra cost to you, and at no risk to my ongoing love affair with air dry clay. If you buy something through one of these links, you’re basically funding my next bag of clay, and I thank you for it.
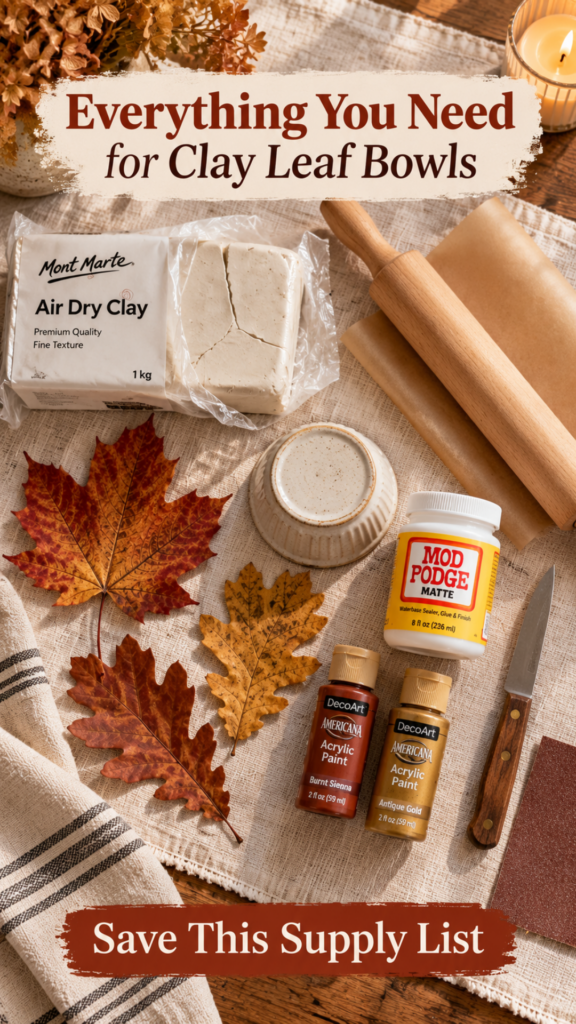
What You’ll Need to Make a Clay Leaf Bowl
- Air dry clay (white or terracotta both work beautifully — terracotta gives you that warm, earthy fall tone right out of the bag)
- Real fall leaves with strong, visible veins (maple, oak, and sweetgum leaves are my go-to)
- A rolling pin
- Parchment paper or wax paper
- A small bowl, ramekin, or muffin tin to shape the clay over
- A paring knife or clay/craft knife
- Fine-grit sandpaper (optional, for smoothing dry edges)
- Acrylic paint in fall tones (optional)
- A sealant like Mod Podge or a clear resin sealer
Choosing the Best Leaves for a Clay Leaf Bowl
Not every leaf you find on the ground will give you a good imprint, so it’s worth being a little picky. Look for leaves that are:
Freshly fallen or just picked, rather than dried and crumbly — a leaf that’s gone brittle will crack instead of pressing cleanly into the clay. Leaves with deep, raised veins on the underside, since that’s the side you’ll press into the clay to get the most texture. Maple, oak, sweetgum, and even sturdy rose or hosta leaves all work well. If your leaves feel a little too stiff, let them sit in a damp paper towel for 10–15 minutes before you start — it makes them more pliable without tearing.
How to Make a Clay Leaf Bowl With Real Leaves, Step by Step
1. Roll out your clay. On a piece of parchment paper, roll your air dry clay to about a quarter-inch thickness — thin enough to drape and shape, thick enough that your bowl won’t crack once it’s dry.
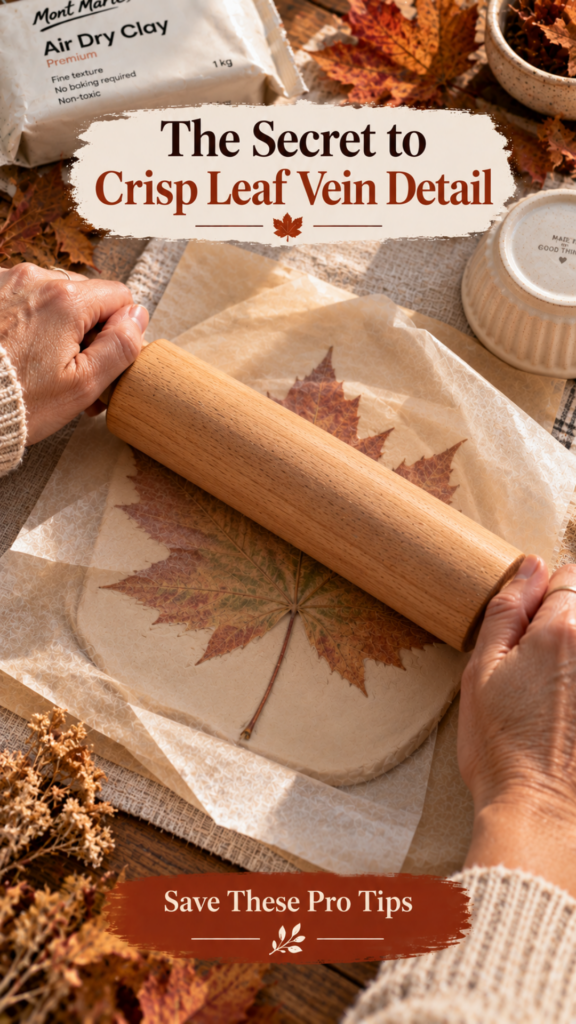
2. Press the leaf into the clay. Lay your leaf vein-side down onto the clay, then place a second sheet of parchment on top and roll over it firmly with your rolling pin. Press hard enough to transfer every vein and ridge into the surface.
3. Cut around the leaf shape. Peel back the top parchment, then use your craft knife to trace and cut around the leaf’s outline, following the natural curves and points. Gently peel the real leaf away to reveal the imprint underneath.
4. Shape it into a bowl. While the clay is still soft and pliable, drape it — leaf-imprint side up — over an upside-down small bowl, ramekin, or muffin tin cavity. Gently press and smooth the edges so they curve naturally, letting a few points or waves stay slightly uneven for that just-picked look.
5. Let it air dry completely. Leave the clay on its form until it holds its shape on its own (usually a few hours), then transfer it to a flat surface to finish drying for 24–48 hours, flipping occasionally so it dries evenly. Air dry clay needs to be fully, completely dry all the way through before you touch a sealant — rushing this step is the number one reason clay projects crack or bubble later. I go into this in a lot more depth in how to seal air dry clay if you want the full rundown.
6. Sand and finish. Once it’s bone dry, lightly sand any rough edges. If you want to deepen the leaf’s natural color, brush on a thin acrylic wash in rust, amber, or gold before sealing — or leave it au naturel for a more organic, stone-like finish.
7. Seal your bowl. Finish with two to three thin coats of Mod Podge or a clear resin sealer, letting each coat dry fully between applications. This is what gives your leaf bowl that soft sheen and protects it from humidity.
Tips for a Crisp, Clean Leaf Imprint
A few small things make a big difference here. Press straight down and evenly rather than rocking the rolling pin, so you don’t blur the vein lines. Work with clay that’s still fresh and slightly tacky — clay that’s started to skin over on the surface won’t take an imprint well. And if your first leaf doesn’t leave a deep enough impression, don’t be afraid to re-roll the clay and try again with a different leaf; this is a very forgiving craft.
What to Do With Your Finished Clay Leaf Bowl
These little bowls aren’t food-safe or waterproof, but they’re perfect for holding jewelry on a dresser, catching keys by the front door, corralling candles on a fall tabletop, or gifting filled with a few acorns and a votive for a hostess gift. Grouped in twos and threes with different leaf shapes, they make one of the coziest little vignettes on a console table all season.
More Fall Clay Projects to Try
If leaf bowls have you hooked on air dry clay, you’ll probably love a few of my other fall projects: 25 Fall Air Dry Clay Projects That Make Your Home Feel Instantly Cozy, Easy Air Dry Clay Ideas for Beginners, and if this is your very first time working with clay, my DIY Cold Porcelain Clay Recipe shows you how to make your own at home for pennies.
FAQ: Clay Leaf Bowls
What’s the best clay for a leaf bowl? Air dry clay is the easiest choice since you don’t need a kiln or oven, and it holds a crisp leaf imprint beautifully. White air dry clay lets you paint any color you like; terracotta clay gives you a warm fall tone with no painting required.
Can I leave the real leaf inside the clay permanently? I don’t recommend it — organic material trapped under a sealant can trap moisture and eventually mold or discolor. The leaf’s job is to create the imprint; once you’ve pressed and cut around it, peel it away and let the clay itself do the rest.
How long does a clay leaf bowl take to dry? Most air dry clay bowls take 24–48 hours to dry fully, depending on thickness and humidity. Thicker bowls or humid climates can take longer — always check that it’s dry all the way through, not just on the surface, before sealing.
Is a clay leaf bowl waterproof or food safe? No — even sealed, these bowls are decorative only. Keep them for jewelry, keys, or dry display pieces rather than food or liquids.
Whichever leaves you end up pressing, I’d love to see them — tag me if you make a set of your own this fall.
Jennifer Dawn
Skip the Craft-Aisle Guesswork
The exact air-dry clay, tools, sealers, and finishing supplies I actually keep in my studio — sent straight to your inbox.
You're in!
Your Boutique Clay Shopping & Supply Checklist is on its way — check your inbox in the next few minutes.
If you don't see it, peek in your Promotions tab or spam folder and drag it over to your main inbox so my next email lands where you'll actually see it.