
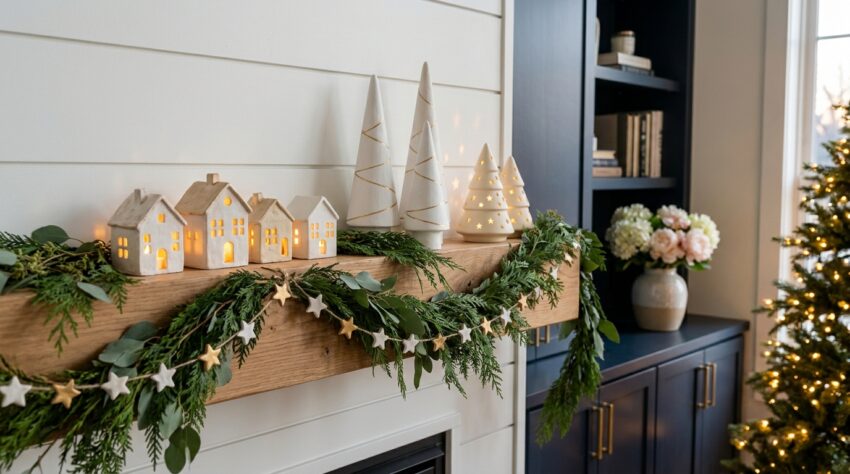
There is a moment every December when the house finally starts to feel like Christmas. The mantel has something handmade on it, the dining table glows, and the hallway feels warm. That is what these air dry clay Christmas decorations are for.
Quick heads-up: this post contains affiliate links. If you buy something through them, I earn a small commission at no extra cost to you, which I will almost certainly spend on more clay and gold paint. As an Amazon Associate I earn from qualifying purchases. Some of the templates below are Etsy finds.
These aren’t ornaments, and they aren’t gifts. They’re the larger pieces for your mantel, shelf, table, and staircase, and you don’t need a kiln or an oven, just your kitchen table. For ornaments, start with my 25 Christmas Air Dry Clay Projects. This post is the home-decor-only deep dive: a boutique-bought look for very little cost, with pieces that store beautifully year after year.
A home full of clay Christmas decorations in 3 simple moves
- Pick one group. Trees, a village, candle holders, or a garland. Start with just one.
- Use one method. Roll, cut or build, dry slowly, then sand, paint, and seal.
- Style it where you live. Mantel, shelf, table, console, or staircase. LED lights only.

Supplies for These Air Dry Clay Christmas Decorations
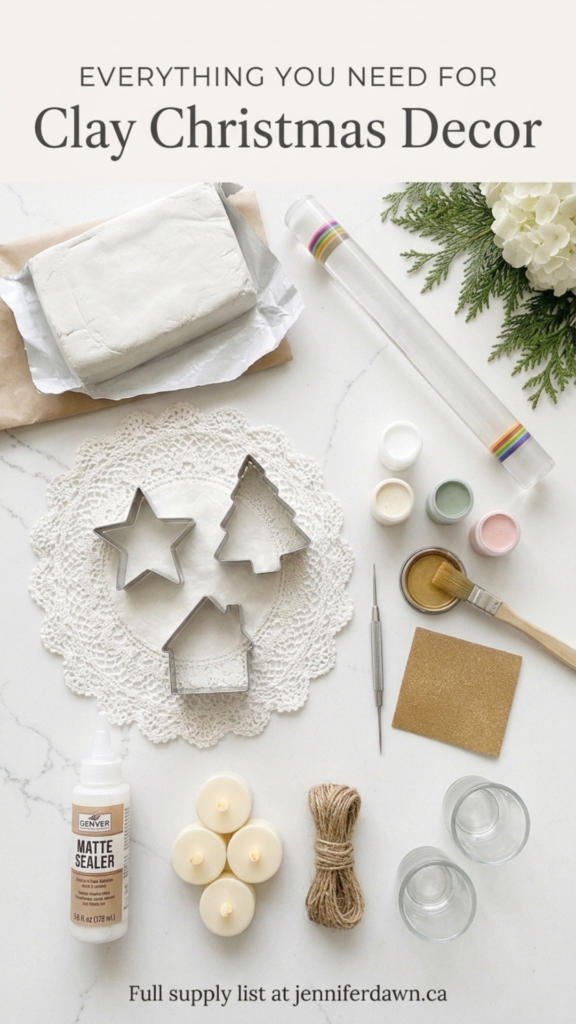
You don’t need a studio. Most of these Christmas clay crafts use the same short list of supplies, so once you have them you can make every project in this post.
Everything you need for your home decor pieces
- White air dry clay: the base for almost everything here
- Rolling pin with guides: for even slabs, about 6 mm thick
- Cutters: stars, trees, houses, and scalloped edges
- Texture tools: a lace doily, leaf, fork, needle tool, or toothpick
- Fine-grit sandpaper: for smoothing edges after drying
- Acrylic and gold paint: white, ivory, sage, and blush, with gold for edges
- Clear sealer: matte or satin, for 2 to 3 thin coats
- LED tea lights and fairy lights: battery-operated only
- Jute and twine: for hanging garlands
- Glass or metal inserts: small glass votives or metal cups, so a real candle never touches clay
- A wooden tray or long board: for displaying a village or forest as one piece
Shop the Templates and Tools
These are the templates, cutters, and patterns I use for the projects below, all from Etsy. Prices and styles vary, and the project numbers tell you which template goes with which piece.
Templates for the trees, village, and candle holders
- Christmas Tree Ceramic Lantern Template by Chanchanpottery: the template I use for the pierced tree luminaries in projects 2 and 9
- Christmas Tree Lantern Pottery Template by SlabCraftCo: another tree lantern option for projects 2 and 9
- Three Tea Light Houses Template by UIObjectDesign: for the village houses and house tealight holders in projects 5, 8, and 10
- Christmas Ornament Clay Cutter Set (75 mm) by Lulicutter: for cutting tree and holiday shapes
- Christmas Pottery Templates Set of 4 by CerAtelier: tree, gnome, bell, and gift box slab-building templates
- Gingerbread Luminary Village Template by MyPotteryNest: a 3-house tealight village for projects 5, 8, and 10
- Holly Berry Tealight Holder Template by BloomCozyNest: a lantern template for the candle holders in projects 9 to 12
- Pottery Advent Candle Wreath Template by PotteryPattern: a candle wreath with four candle cups for the mantel or table
- Holly Christmas Wreath Pottery Template by GaiaPotteryStore: a holly-and-berry clay wreath for the mantel
- Dwarf Candle Holder Pottery Template by ceramixis: a slab-built Christmas dwarf luminary for projects 9 to 12

How to Make Air Dry Clay Christmas Decorations: The Basic Method
Learn this once, and you can make every project in this post. Start a few days before you want to display your pieces, because slow drying is what keeps them from cracking.
Air dry clay is not heat-safe and not waterproof. Use LED tea lights or fairy lights only inside houses and holders, or a glass or metal insert for a real candle. Never let a bare flame touch clay.
The basic clay decor method
- Knead. Knead for 2 to 3 minutes until soft and smooth. Keep unused clay wrapped.
- Roll to 6 mm. Roll an even slab on parchment, using guides if you have them.
- Texture. Press a doily, leaf, stamp, or fork lightly into the surface. Pierce holes now, while the clay is soft.
- Cut, pierce, or build. Cut shapes, or build houses and trees from slabs, joining edges with slip (clay mixed with water).
- Dry slowly for 24 to 72 hours. Leave pieces flat on parchment in a cool, dry room and flip them on the first day. Don’t rush them.
- Finish. Sand rough edges, wipe away the dust, paint, then seal with 2 to 3 thin coats, letting each coat dry.
For more detail, see my guide to the best air dry clay and my guide on how to seal air dry clay.
Air Dry Clay Christmas Trees for Your Home
Trees are the easiest place to start: a trio on a shelf, a row on the mantel, or a forest on a tray. Style them in odd numbers and at different heights so they look collected, not matched.
1. Tabletop Cone Tree Trio in 3 Sizes
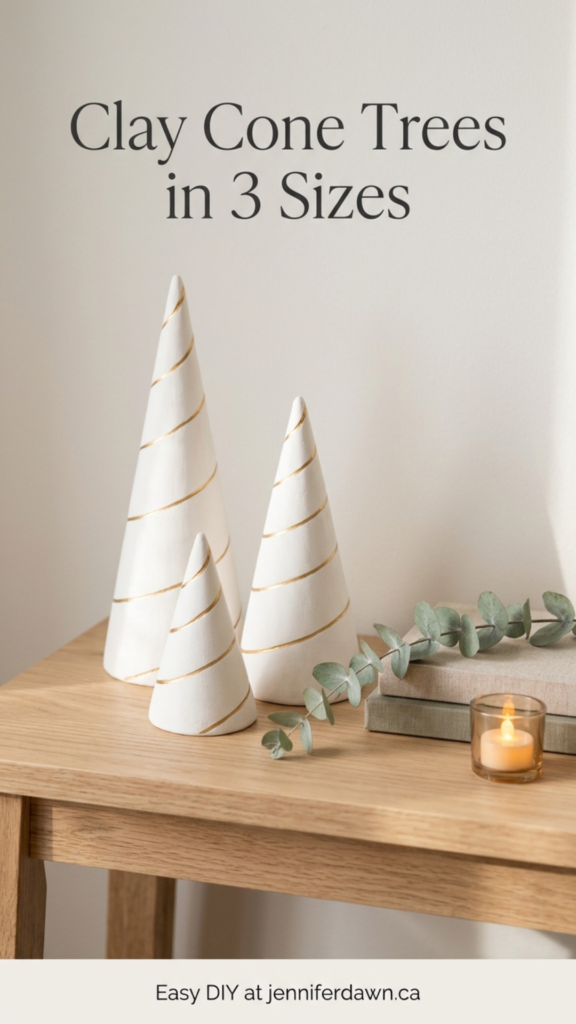
You’ll need: White air dry clay, a paper cone form, a craft knife, sandpaper, paint, and gold paint.
- Wrap clay around paper cones to make three trees, 12, 18, and 25 cm tall.
- Smooth with a damp finger, trim the base flat, and slide the form out.
- Dry 48 to 72 hours, sand the base, then paint and add a gold line.
Jennifer’s tip: Style them on a shelf or entry console with books and an LED tea light.
2. Pierced Slab Christmas Tree Luminaries
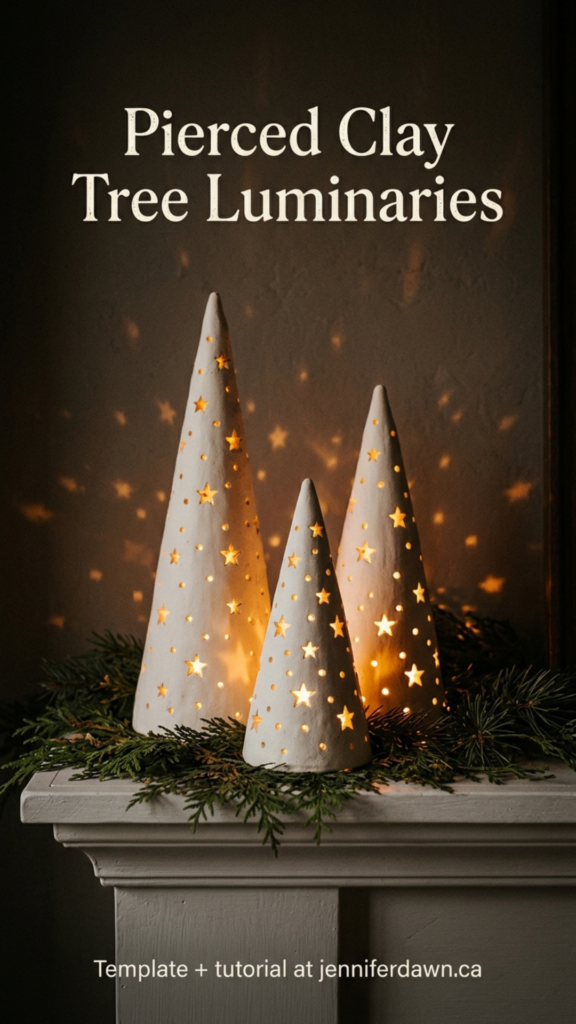
You’ll need: White air dry clay, a Christmas tree luminary template, a straw and needle tool, and an LED tea light.
- Cut two matching tree shapes from a 6 mm slab, using a tree template.
- Pierce stars and dots into one face, then join the trees with a clay strip.
- Dry 48 hours, sand, paint white, seal, and add an LED tea light.
Jennifer’s tip: Put three on the mantel. The light through the holes is magical at night.
3. Flat Scandinavian Trees for the Mantel
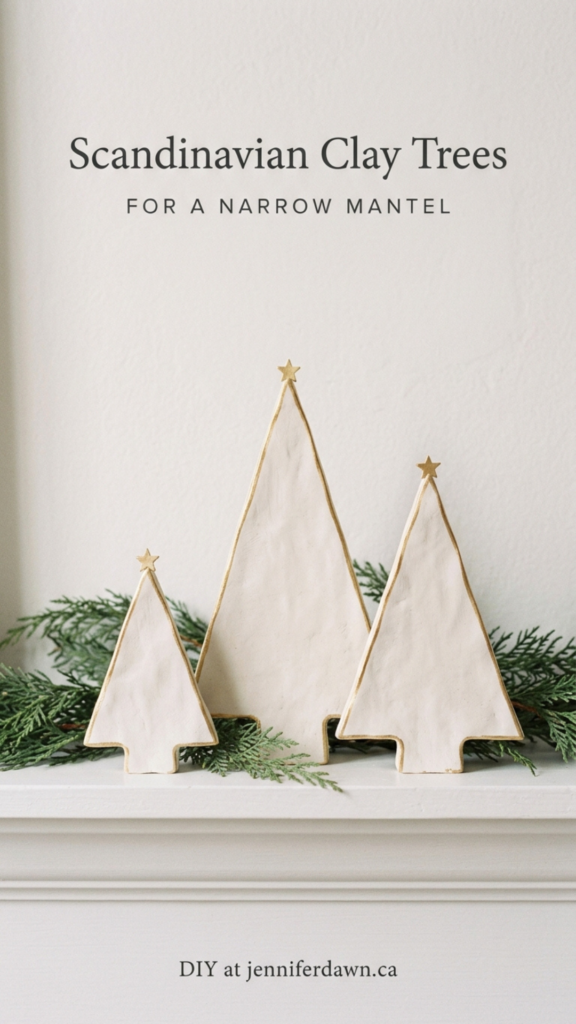
You’ll need: White air dry clay, a large tree cutter or paper template, sandpaper, and paint.
- Roll a slab and cut three flat trees in different sizes.
- Smooth the edges, dry flat for 24 to 48 hours, flipping once, then paint white.
- Brush gold along the edges and add a tiny star at the top, then stand them up.
Jennifer’s tip: These are perfect for a narrow mantel.
4. A Clay Tree Forest on a Wooden Tray
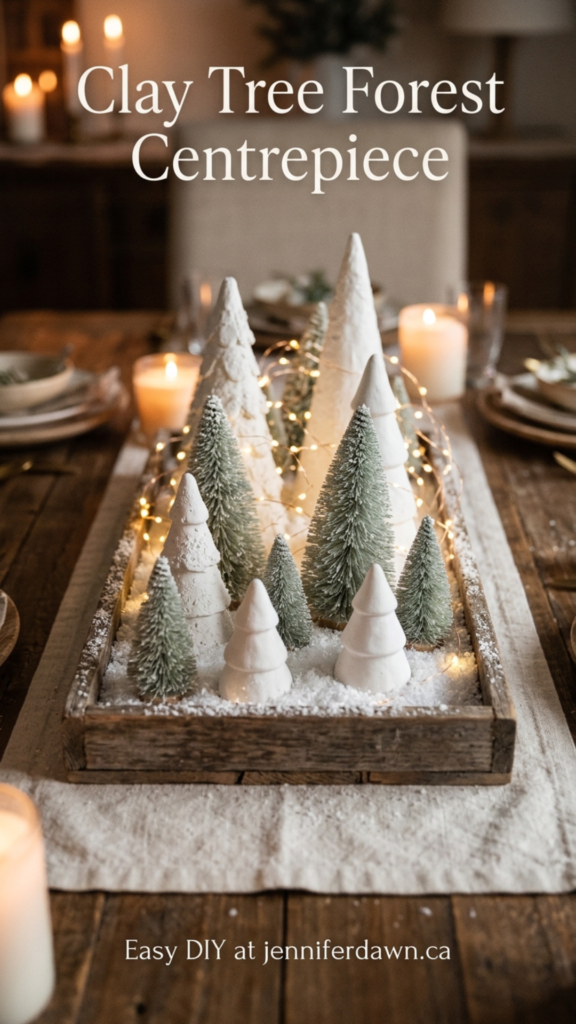
You’ll need: White air dry clay, a wooden tray, small tree cutters, bottle brush trees, faux snow, and LED fairy lights.
- Make 7 to 9 small trees in different heights, then dry and seal them.
- Arrange them on the tray, tallest at the back and smallest at the front.
- Tuck bottle brush trees between them, add faux snow, and weave fairy lights through the back.
Jennifer’s tip: This is my favourite dining table centrepiece. It’s low, and you can lift it off as one tray.
A Glowing Air Dry Clay Christmas Village for Your Home
A clay Christmas village is the piece people remember. Slightly wonky houses and warm little windows are what make it charming. Keep the palette calm, build it on a tray, and use LED tea lights only.
5. Mantel Village of 5 Houses at Different Heights
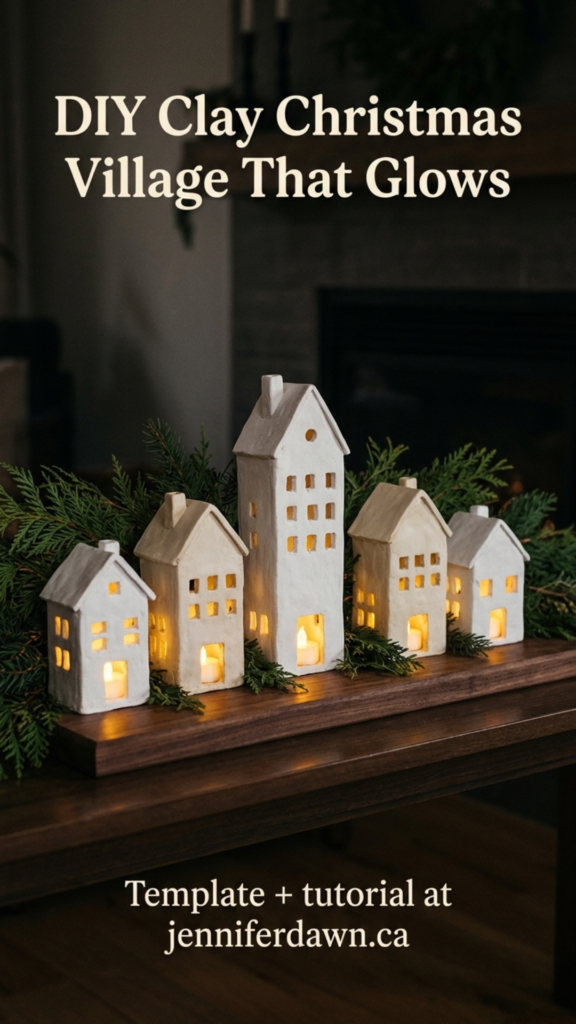
You’ll need: White air dry clay, a three tea light houses template, a craft knife, 5 LED tea lights, and a long board.
- Cut house slabs from a template and build five houses in different heights.
- Cut a door, windows, and a back opening in each house, then join the edges with slip.
- Dry 48 to 72 hours, paint white and cream, seal, and add an LED tea light.
Jennifer’s tip: Put the tallest house in the middle, with the heights stepping down on each side.
6. Scandinavian Flat House Row Behind Fairy Lights
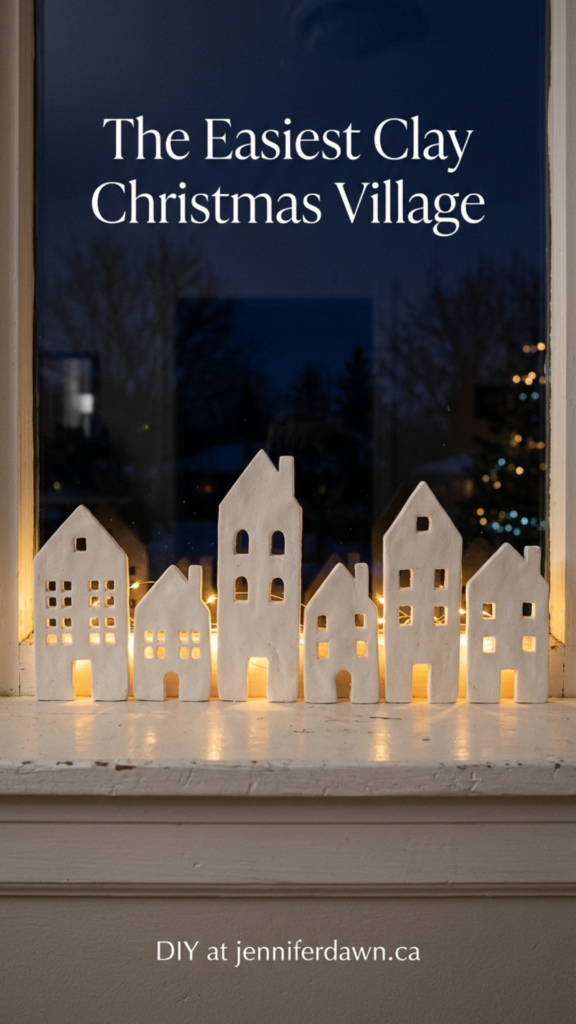
You’ll need: White air dry clay, a house cutter or paper template, sandpaper, white paint, and battery fairy lights.
- Cut 5 to 7 flat houses in a range of sizes, and pierce a window and door in each.
- Dry flat for 24 to 48 hours, sand, paint white, and stand them in a row.
- Drape battery fairy lights just behind the row, so the light glows through the windows.
Jennifer’s tip: This is the easiest village, and the loveliest at night.
7. Gingerbread-Style Village Houses with White Icing Paint
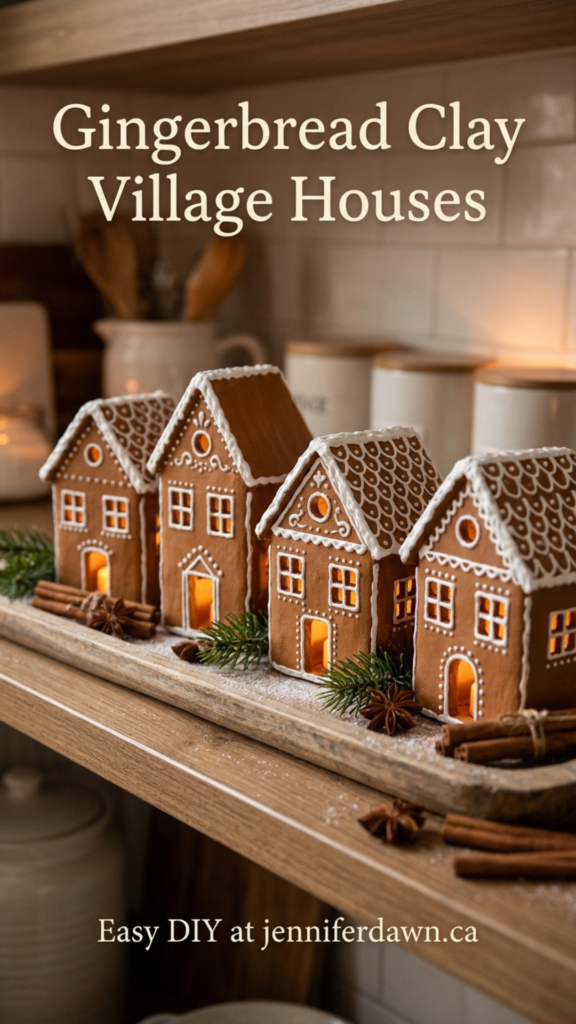
You’ll need: White air dry clay, brown acrylic paint, white puffy paint, a house template, and LED tea lights.
- Build 3 to 4 simple houses from slabs, with windows, doors, and a back opening. Dry 48 to 72 hours.
- Paint the houses a warm gingerbread brown, seal once, then pipe white icing lines along the roofs and windows.
- Set them on a tray with an LED tea light inside each house, and cinnamon sticks beside them.
Jennifer’s tip: Style them on a kitchen shelf or the dining table.
8. Village Centrepiece on a Tray with Bottle Brush Trees
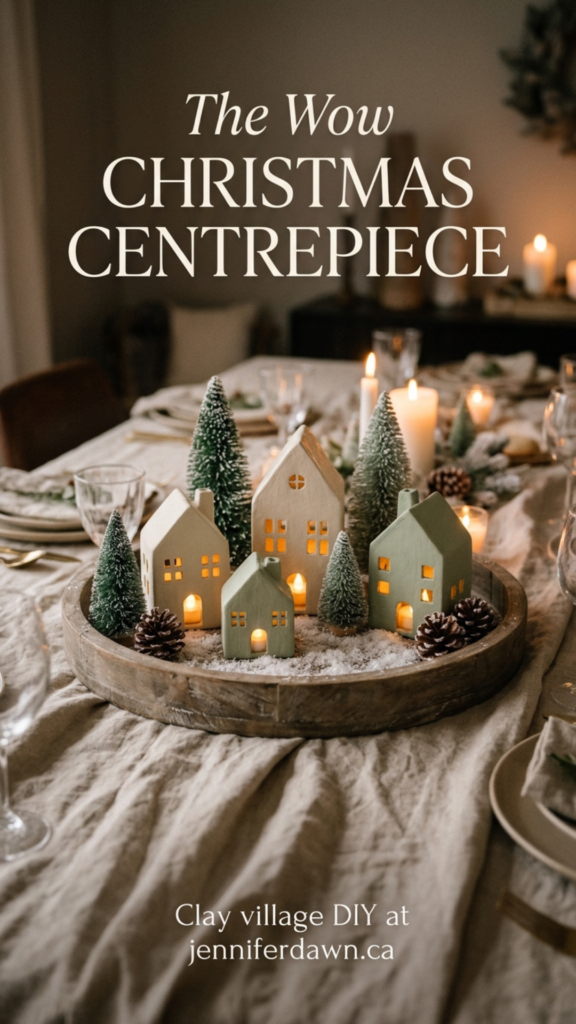
You’ll need: White air dry clay, a large tray, 4 to 5 small houses, bottle brush trees, faux snow, LED tea lights, and pinecones.
- Make 4 to 5 houses in different sizes, dry, paint in cream and sage, and seal.
- Arrange them on the tray with space between them, with an LED tea light inside each.
- Add bottle brush trees, faux snow, and two or three pinecones. Keep the centre low.
Jennifer’s tip: This is the wow piece for the table. Carry it to the mantel after dinner.
Clay Candle Holders That Make the Room Glow
Clay candle holders are where Christmas clay ideas turn into atmosphere: a soft glow on a dining table or a row on a mantel. Remember that air dry clay is not heat-safe, so use LED tea lights or a glass or metal insert.
9. Pierced Tree Luminary Candle Holders
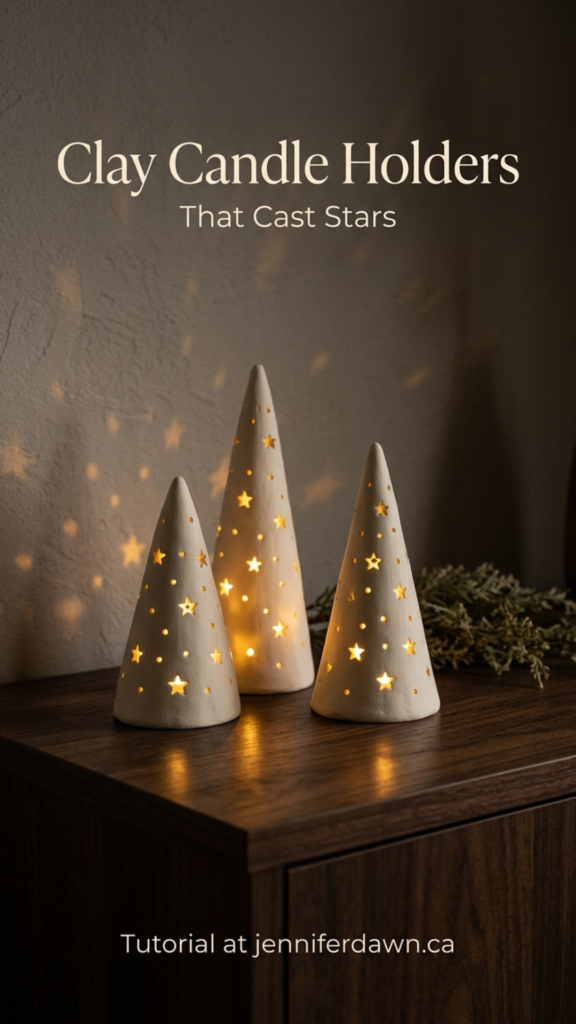
You’ll need: White air dry clay, a tree luminary template, a straw and needle tool, and LED tea lights.
- Cut a tree shape from a slab using a tree luminary template, then pierce stars and dots.
- Form it into a hollow luminary, joining the back seam with slip. Dry 48 hours.
- Sand, paint ivory, seal, then place a battery LED tea light inside.
Jennifer’s tip: Make three in different heights. The holes cast tiny stars on the wall.
10. House Tealight Holders
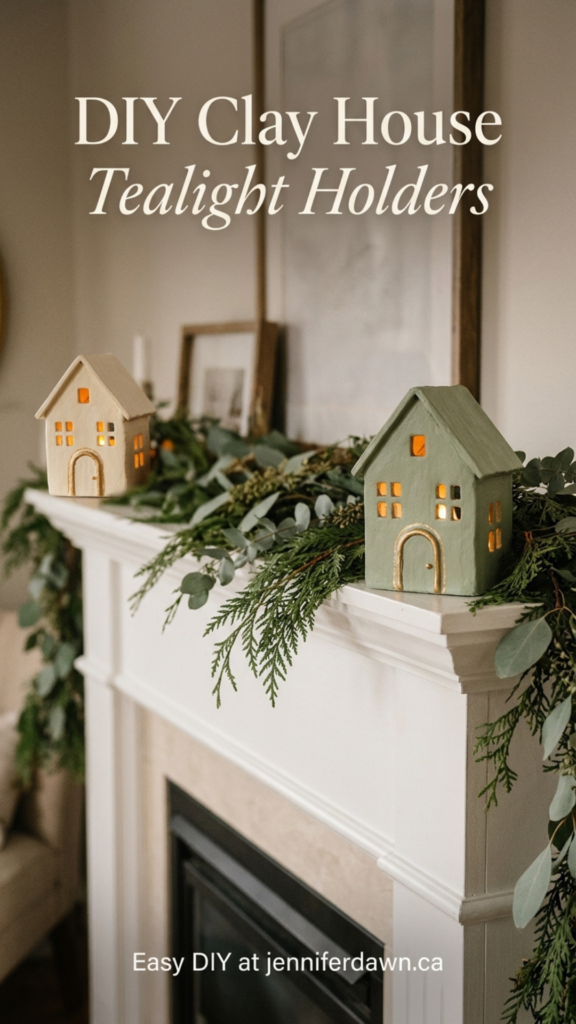
You’ll need: White air dry clay, a clay house template, a craft knife, LED tea lights, and a small glass votive.
- Build a small house from slabs, with a pitched roof, door, and windows. Leave the base open.
- Dry 48 to 72 hours, sand, paint cream or sage, add gold around the door, and seal.
- Use an LED tea light inside, or a small glass votive for a real tea light.
Jennifer’s tip: Put one on each side of the mantel.
11. Star and Scalloped Votive Holders with Glass Insert
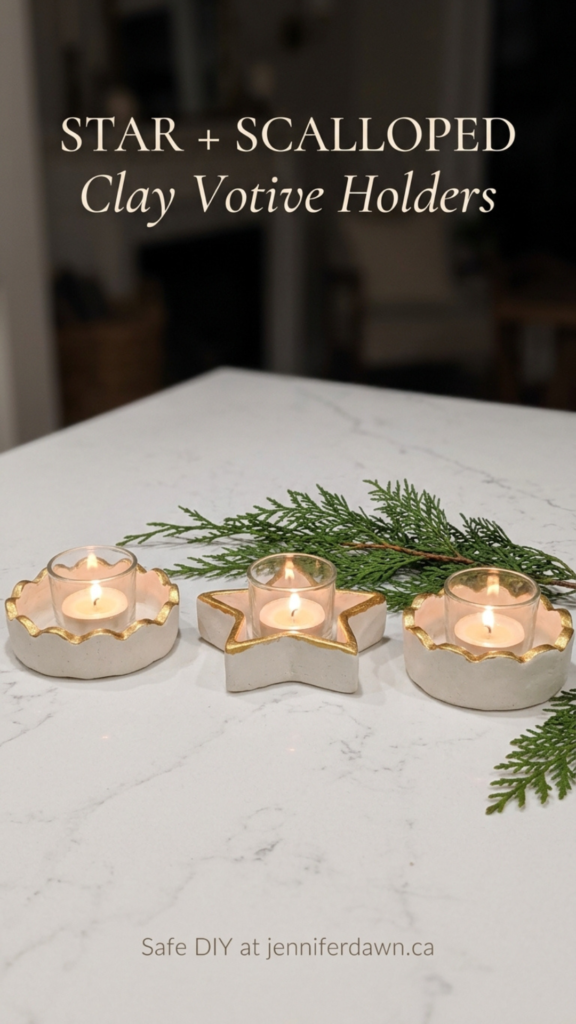
You’ll need: White air dry clay, a star or scalloped cutter, a small glass votive, sandpaper, and gold paint.
- Cut a wide star or scalloped circle, then build a low wall around the edge, about 5 cm high.
- Smooth the rim, dry flat for 24 to 48 hours, sand the base level, paint white, and add gold.
- Set a small glass votive inside the clay dish, and place your candle inside the glass.
Jennifer’s tip: These are lovely in a row of three. The glass insert makes them safe.
12. Taper Holders with Metal Insert
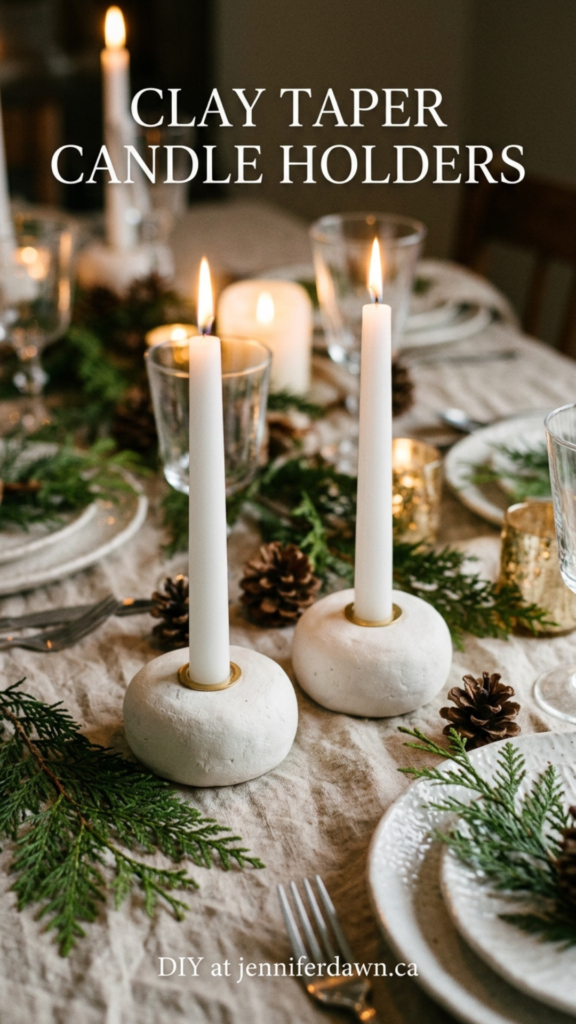
You’ll need: White air dry clay, a small metal taper holder insert, a craft knife, sandpaper, and paint.
- Roll a small, thick base, about 8 cm across and 2 cm thick. Press the metal insert into the centre, then remove it.
- Dry 24 to 48 hours, sand, paint, and seal. Set the metal insert back into the hole.
- Place a taper candle in the metal insert only. The metal protects the clay.
Jennifer’s tip: Make a pair for the dining table, with plain white tapers.
Air Dry Clay Christmas Garlands for the Mantel and Staircase
A garland is the fastest way to make a mantel or staircase feel finished. Clay garlands are light, hold their shape, and look far more special than paper. Hang them with jute or twine, and store them flat in tissue.
13. Star Garland for the Mantel

You’ll need: White air dry clay, star cutters in 2 sizes, jute twine, a needle tool, and gold paint.
- Cut 9 to 11 stars in two sizes, and pierce a hole at the top of each. Dry flat for 24 to 48 hours, flipping once.
- Sand and paint them white, with gold on every second star. Thread jute twine through, knotting behind each one.
- Drape it across the mantel in a soft swag, with the ends hanging down a little.
Jennifer’s tip: Add greenery behind the garland. The green makes the white stars pop.
14. House-and-Tree Garland for a Staircase or Doorway
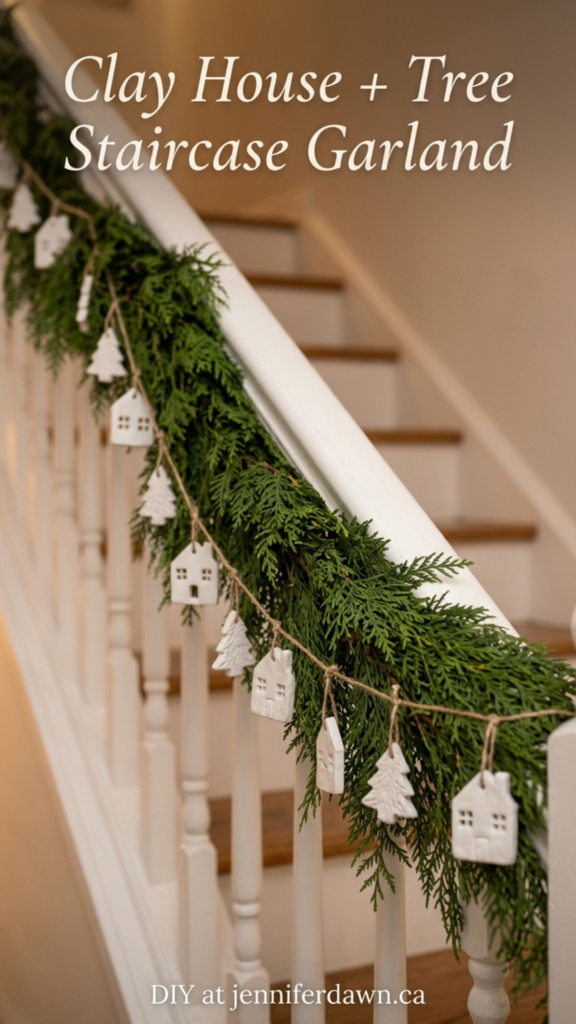
You’ll need: White air dry clay, small house and tree cutters, jute twine, a needle tool, and paint.
- Cut 5 small houses and 5 small trees, and pierce a hole at the top of each. Dry flat, sand, and paint.
- Thread them onto jute twine in a house-tree pattern, knotting behind each piece.
- Hang it along a staircase banister or across a doorway, letting it swag gently.
Jennifer’s tip: Keep the pieces small for a staircase, about 6 to 7 cm tall, so they hang neatly.
15. Dried Orange and Clay Star Garland
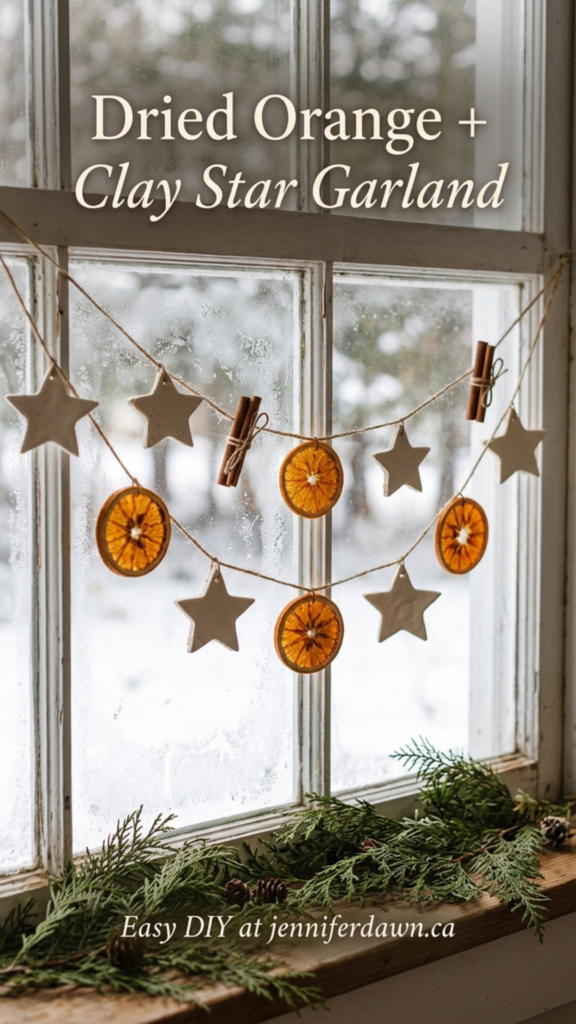
You’ll need: White air dry clay, star cutters, dried orange slices, cinnamon sticks, and jute twine.
- Make 7 to 9 small clay stars, dry them, paint white or leave them natural ivory, and seal.
- Thread the stars onto jute twine, alternating each star with a dried orange slice and a cinnamon stick.
- Hang it on the mantel or across a window. The oranges add colour and scent.
Jennifer’s tip: This one is beautiful above a dining table centrepiece.
16. Cinnamon Star Garland (Scented)
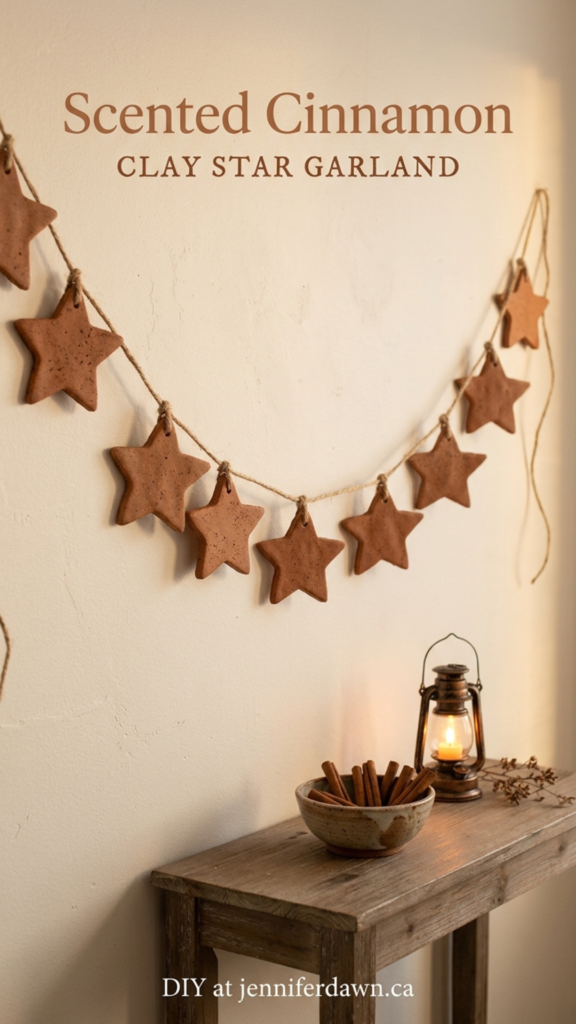
You’ll need: White air dry clay, ground cinnamon, star cutters, jute twine, and a needle tool.
- Knead 1 to 2 teaspoons of ground cinnamon into the white clay, then roll it out, cut 9 stars, and pierce a hole in each.
- Dry flat for 24 to 48 hours, sand lightly, seal once, and thread onto jute twine.
- Hang it in a hallway, on a mantel, or on a staircase where people brush past it.
Jennifer’s tip: Don’t overdo the cinnamon. Too much can make the clay crumbly.
The one to make first: If you only make one thing, make the mantel village (project 5), or the tray village in project 8 for a centrepiece. The method is the same, a little wonky is charming, and it glows. Turn the LED tea lights on at 5 p.m., and your whole room changes.
How to Seal and Care for Clay Christmas Decorations
These pieces last for years if you seal them and store them well.
Keep your clay decor looking new
- Seal with 2 to 3 thin coats. Let each coat dry fully. Thin coats dry clear and smooth.
- LED only inside houses and holders. Battery tea lights and fairy lights are the safe choice.
- Keep them dry. Air dry clay is not waterproof, so keep pieces away from leaks and damp rooms.
- Handle by the base. Don’t pick them up by a roof or thin edge.
- Wrap in tissue to store. Wrap each piece in tissue and store it flat in a box.
Air Dry Clay Christmas Decorations FAQ
QWhat is the best clay for air dry clay Christmas decorations?
White air dry clay. It rolls easily, holds detail well, and dries to a soft ivory that looks beautiful painted or left natural.
QHow long do clay Christmas decorations take to dry?
Most flat pieces take 24 to 48 hours, and thicker houses and trees take 48 to 72 hours. Dry them flat, flip once on the first day, and don’t rush them.
QDo I need to seal air dry clay Christmas decorations?
Yes. Use 2 to 3 thin coats of clear sealer, letting each coat dry. It protects your pieces and gives them a smooth, finished look.
QCan I use real candles in clay candle holders?
Only with a glass or metal insert, and never with a bare flame against the clay. Air dry clay is not heat-safe, so use LED tea lights in houses and luminaries.
QCan kids help with these Christmas clay crafts?
Yes, with supervision. Flat trees, stars, and garlands are best for kids. Let an adult handle the craft knife, joining the houses, and sealing.
QCan I sell air dry clay Christmas decorations I make?
Yes. Many makers sell them at holiday markets and online. Make sure each piece is fully dry and well sealed, and label it for LED lights only or for use with a glass or metal insert.
Final Thoughts
You don’t need a kiln, a studio, or a big budget to make your home feel handmade for Christmas. All it takes is a little clay, an afternoon at the kitchen table, and one calm palette you love. Start with the village, add trees on the mantel, and finish with a garland.
For ornaments to go with these pieces, see my Air Dry Clay Christmas Ornaments: 20 Handmade Ideas That Look Stunning on the Tree. For handmade gifts, see Air Dry Clay Gifts People Will Actually Use. For a different clay to try, see my Polymer Clay Christmas Ornaments and Earrings. And when you’re ready to wrap it all beautifully, my Christmas Gift Wrapping Ideas will help.
Printable templates I love for matching ornaments
- Christmas Ornament Pottery Template (12 Ceramic Ornaments) by MyPotteryNest
- Christmas Bauble Pottery Template by Chanchanpottery
- Snowflake Ornament Pottery Template by Chanchanpottery
Turn Your Crafts Into Income
If you love making things and want to earn from your blog, Pinterest, and handmade ideas, join me inside the Multi-Passionate Income Collective. Founding member pricing is open now and goes up in January.
JOIN THE COLLECTIVESave this for your Christmas decorating weekend. Pin it to your Christmas decor board so it’s ready when the clay comes out.
Happy making, and happy Christmas.
Jennifer Dawn
