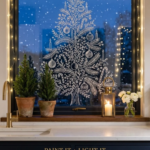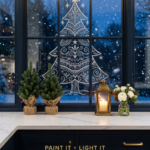

Christmas window decorations do something no other holiday decor can: they work twice. You see them from your couch with your morning coffee, and every neighbor walking their dog sees them from the sidewalk. Pair a hand-painted window with the right lights and your whole house looks like a Christmas card by 5 p.m. You don’t need art skills or a big budget, just a few markers, a string of lights and an afternoon.
Quick heads-up: some links in this post are affiliate links. If you buy something through them, I earn a small commission at no extra cost to you, which I will almost certainly spend on more window markers. As an Amazon Associate I earn from qualifying purchases.
In this guide you’ll find 4 colorful Christmas window painting ideas, 7 white chalk marker Christmas window drawing designs, 5 ways to use Christmas window lights and 2 combo looks that layer both. I’ve also included the supplies I recommend, step-by-step tips, how to remove window paint without a fight, and light safety basics. If you love a calmer look, my minimalist Christmas window painting ideas are the perfect companion to this post.
A glowing Christmas window in 3 simple moves
- Pick one design. A single wreath, tree or snow globe is enough to make the whole window festive.
- Add warm white lights. Curtain fairy lights or a lit frame make the design glow at night.
- Style the sill. A candle, greenery and a little potted tree finish the look from inside the room.
What You Need for DIY Christmas Window Decorations
You can do every idea in this post with a short list of supplies. Most of them last for years, so it’s a one-time investment for every Christmas to come.
Window art supplies
- White liquid chalk markers in fine and bold tips for drawing designs
- Colored chalk markers for red bows, greenery and berries
- Washable window paint or tempera for big fill areas
- Flat brushes plus one fine detail brush
- Faux snow spray and snowflake stencils
- Painter’s tape to protect the frame and trim
Window lighting supplies
- Warm white curtain fairy lights for inside windows
- Clear adhesive light clips so you never nail the trim
- Window candles with a built-in timer
- LED star or snowflake lights to hang in the panes
- Suction cup hooks for hanging lights on glass
- A plug-in timer so everything glows on schedule
Chalk markers and window paint wipe off smooth, sealed glass easily, but they can stain etched glass, frosted glass and some low-E coated windows. Put a tiny test dot in a bottom corner, let it dry overnight, then wipe it off before you start your design.
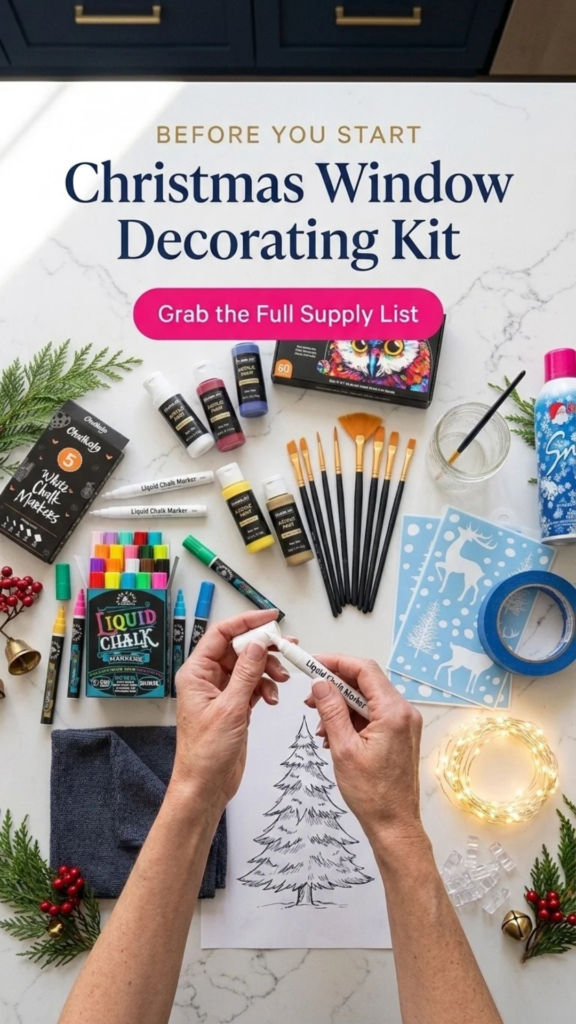
My Christmas Window Decorating Kit
Everything you need to paint, draw and light your windows this season, in one list.
SHOP THE LIST4 Colorful Christmas Window Painting Ideas
These colorful designs are the most-saved Christmas window painting ideas on Pinterest right now. They look like a professional window artist painted them, but each one is built from simple shapes you can layer one at a time.
1. Holly Wreath and Red Bow Window Painting
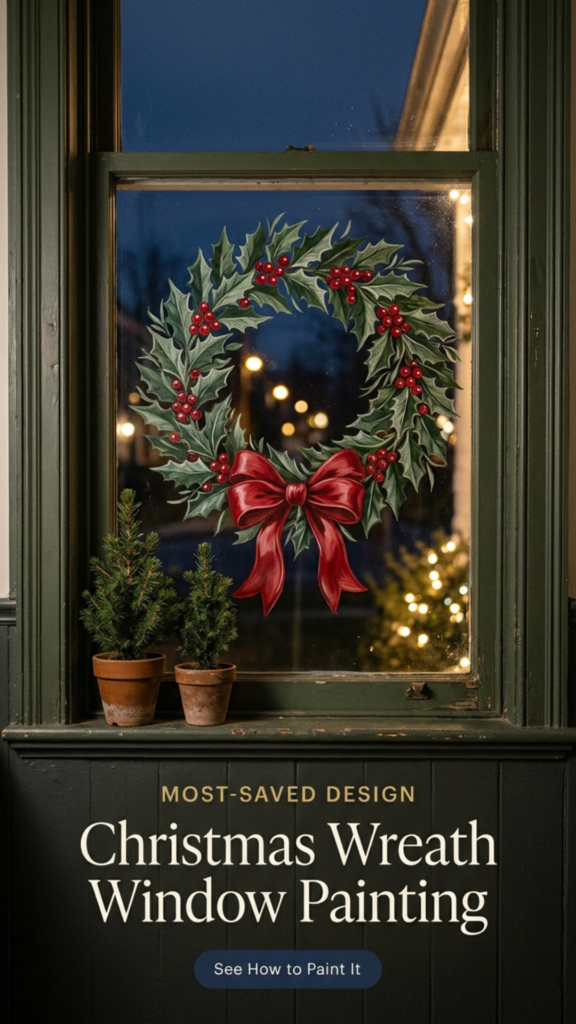
You’ll need a white chalk marker, dark and light green window paint, bright red and deep red paint, a medium flat brush, a fine detail brush and a 45 cm bowl. Start by cleaning the glass and letting it dry completely. Hold the bowl against the center of the window and trace around it lightly with the white marker, then draw a second circle about 10 cm inside the first to create a ring. With the flat brush, paint holly leaves in dark green all the way around the ring, shaping each one as a long oval with three or four small points down each side. Angle them in different directions and let them overlap slightly. Let them dry for 20 minutes, then fill every gap with lighter green leaves so the wreath looks full and dimensional. Once dry, use the detail brush to paint a thin pale green or white vein down the center of each leaf. Next, dot red berries in clusters of three around the wreath, then add a tiny white dot on each berry so it looks glossy. For the bow, paint two rounded loops at the bottom of the wreath, a small knot between them and two tails with V-cut ends, all in bright red. Let it dry, then paint deep red inside each loop and along one side of each tail to create satin folds. Wipe away any visible sketch lines with a damp cotton swab, and set two potted mini pine trees on the sill below to finish the look.
2. Ornament Wreath with Merry Christmas Lettering

You’ll need teal, dark green, red and metallic gold chalk markers, a white chalk marker for sketching and a large dinner plate. Clean the glass, then trace the plate in the center of the pane with the white marker to create your ornament shape. With the gold marker, draw a small loop bow sitting on top of the circle, then a dotted line running straight up from the bow to the top of the window, like the string an ornament hangs from. Next, draw five or six long curved stems in teal that follow the circle, leaving small gaps between them. Add pine needles by making short, quick strokes fanning out from both sides of each stem, mixing in a few dark green strokes for depth. In each gap, draw a thin red stem that splits into a Y, then splits again, and add a round red berry at the end of every branch. Draw three or four long, thin gold lines curving around the inside of the circle to tie the design together. For the lettering, write “MERRY” in small, evenly spaced capitals about 8 cm below the ornament, with a gold dot on each side. Underneath, write “Christmas” in a loose red script, about as wide as the ornament. If you’re not confident with lettering, type the words in a script font, print them about 40 cm wide, tape the paper to the outside of the glass and trace from the inside. Wipe away the white plate outline with a damp swab once everything is dry.
3. Eucalyptus Garland with a Pink Bow
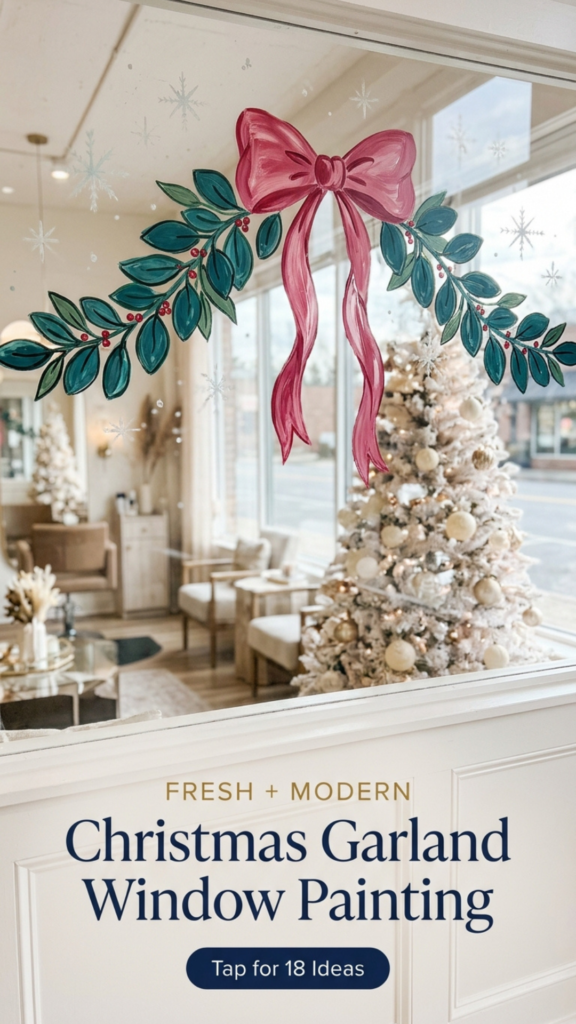
You’ll need deep teal window paint, a dark green chalk marker, raspberry pink and burgundy paint, a red marker, a white chalk marker, a medium flat brush and a fine brush. Clean the glass, then start with the bow so the whole design stays centered. Sketch a bow about 25 cm wide at the top center of the window with the white marker: two large loops, a small knot and two long tails that trail down and outward. Next, sketch the garland stem by drawing a curved line sweeping down from each side of the bow and around, like an open circle or a deep U. Paint eucalyptus leaves along the stems in deep teal, shaping each as a rounded oval and placing them in pairs on opposite sides of the stem. Point the leaves slightly downward and make them gradually smaller toward the ends of the garland, tilting each one at a slightly different angle so they look natural. Let the leaves dry for 20 minutes, then outline each one in dark green and draw a single vein down its center. Fill the bow with raspberry pink and let it dry, then paint burgundy inside each loop, around the knot and along one edge of each tail to create folds. Tuck small clusters of red berries between the leaves along the garland. Finish by adding a few tiny white snowflakes and four-point sparkles around the design, and wipe away any visible sketch lines with a damp swab.
4. Hot Cocoa Mug with a Candy Cane
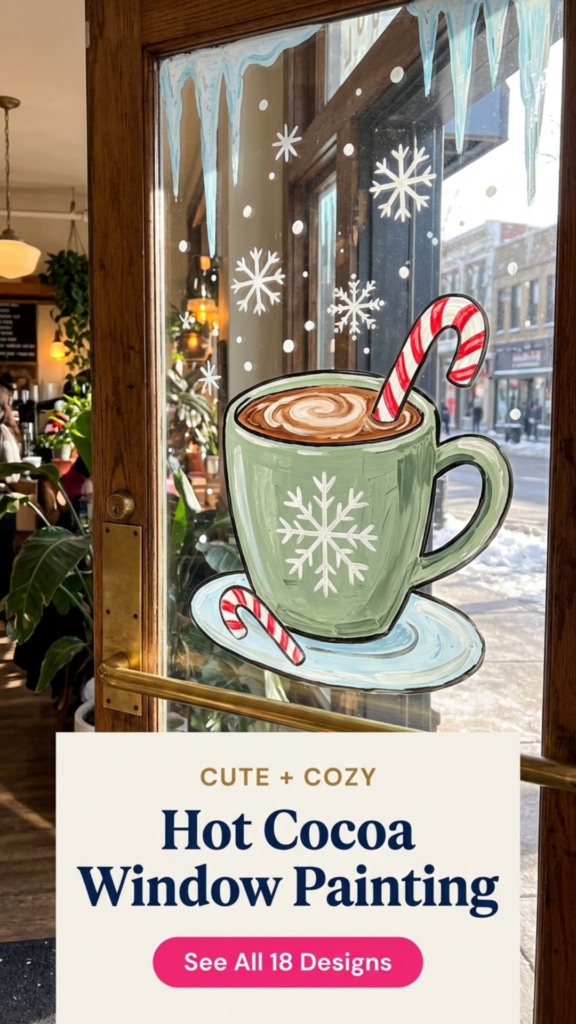
You’ll need sage green, brown, white, red and light blue window paint, a black or dark brown chalk marker, a white chalk marker, a large and a medium flat brush and a fine brush. Clean the glass, then sketch a wide cup shape about 40 cm across with the white marker, making it slightly narrower at the bottom with a rounded base. Add a C-shaped handle on one side and a wide oval saucer underneath. Paint the mug sage green with the large brush, let it dry for 20 minutes, then add a second coat so no light shows through. Next, paint a brown oval across the top of the mug for the cocoa. While it’s still wet, swirl a little white paint into the center in a heart or leaf shape for latte foam. Paint the saucer light blue, then add a thin white line along its rim. For the candy cane, paint a white hook shape rising out of the mug at an angle and a smaller one lying on the saucer. Once they’re dry, paint red diagonal stripes evenly down each one. Paint a white snowflake on the front of the mug and a few larger ones floating above. When everything is completely dry, outline every shape with the black marker for that bold, cheerful look. Finally, paint light blue icicles of different lengths along the top edge of the window and add a thin white highlight down one side of each.
7 White Christmas Window Drawing Ideas (Chalk Marker Designs)
Christmas window drawing with a white chalk marker is the hottest look in this trend. You only need one marker, it looks like delicate etched glass, and it glows beautifully when the lights come on behind it at night. Draw these from the inside of the glass so they look crisp from your living room and the street.
Use a bold tip for main outlines and a fine tip for details like pine needles, swirls and dots. Draw with quick, light strokes rather than slow pressured ones, and the lines stay smooth instead of shaky.
5. Folk Art Christmas Tree Window Drawing
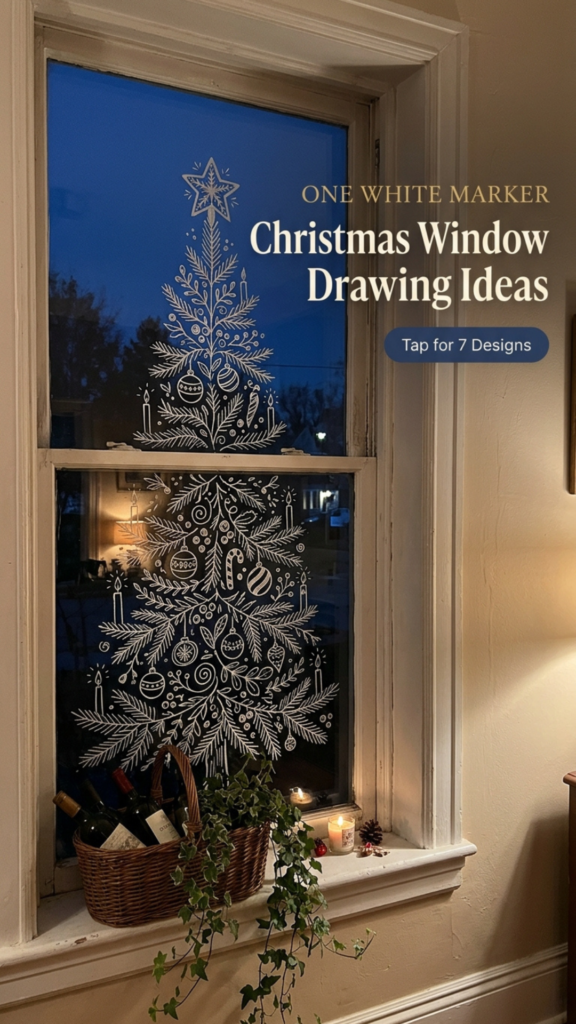
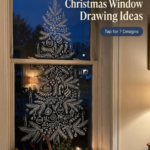
You’ll need a bold and a fine white chalk marker and painter’s tape. Clean the glass and let it dry. Use painter’s tape to mark a tall triangle on the window as a guide, making the base about two thirds as wide as the tree is tall. With the bold marker, draw a five-point star at the very top. Next, choose six or seven small motifs to repeat throughout the tree: a leafy sprig, a pine branch, a round ornament, a striped ornament, a slim candle with a flame, a candy cane and a berry cluster. Practice each one a couple of times on paper first. Starting just under the star, draw your first row of motifs inside the tape guide, keeping each one about the size of your palm. Work down one row at a time, mixing the motifs so no two of the same sit side by side, and let the rows get wider as the triangle widens. Leave a little space between each motif so the tree stays airy. Once the triangle is full, switch to the fine marker and fill any empty spaces with tiny leaves, small dots and little swirls, so the tree reads as one shape from across the room. Draw a simple pot or a few wrapped gifts at the base. Let the marker dry for 10 minutes, then peel the tape off slowly at a low angle.
6. Snowy Stag in the Forest
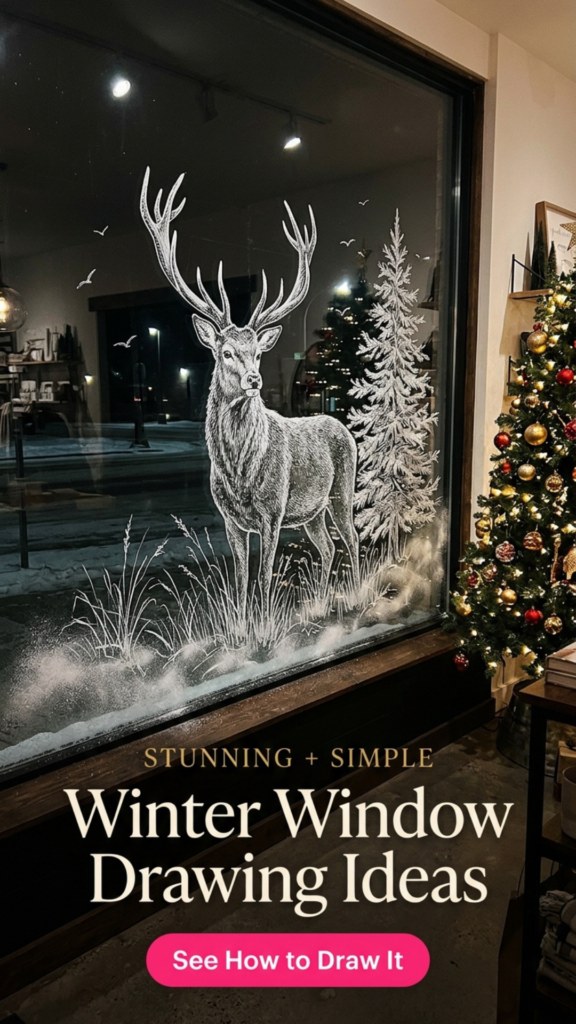
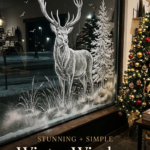
You’ll need a bold and a fine white chalk marker, a printed stag outline, faux snow spray and painter’s tape. Clean the glass, then print a stag silhouette about 60 cm tall, tiling it across several sheets if needed. Tape it to the outside of the window facing in and trace the outline from the inside with the bold marker. If your printout doesn’t include antlers, draw two curving main beams rising from the head, then add three or four tines branching off each one like a Y that keeps splitting. Remove the paper. With the fine marker, add short, close hatching strokes along the chest, the front of the neck and the top of the back for fur, following the direction the fur would grow. Leave the belly, the inner legs and the back of the neck mostly clear glass, which reads as shadow and makes the stag look three-dimensional. Draw an almond-shaped eye, leaving a tiny dot of clear glass for a highlight, and fill in the nose. Beside the stag, draw a tall vertical line for a pine trunk, then add layered branches that droop downward and get longer toward the bottom. Thicken the top edge of each branch with white to look like snow. Along the bottom, flick long, quick upward strokes for winter grass, letting some cross in front of the stag’s legs. Finish with a light spray of faux snow along the bottom and a few small birds in the sky drawn as simple V shapes.
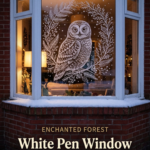
7. Winter Owl in a Botanical Wreath
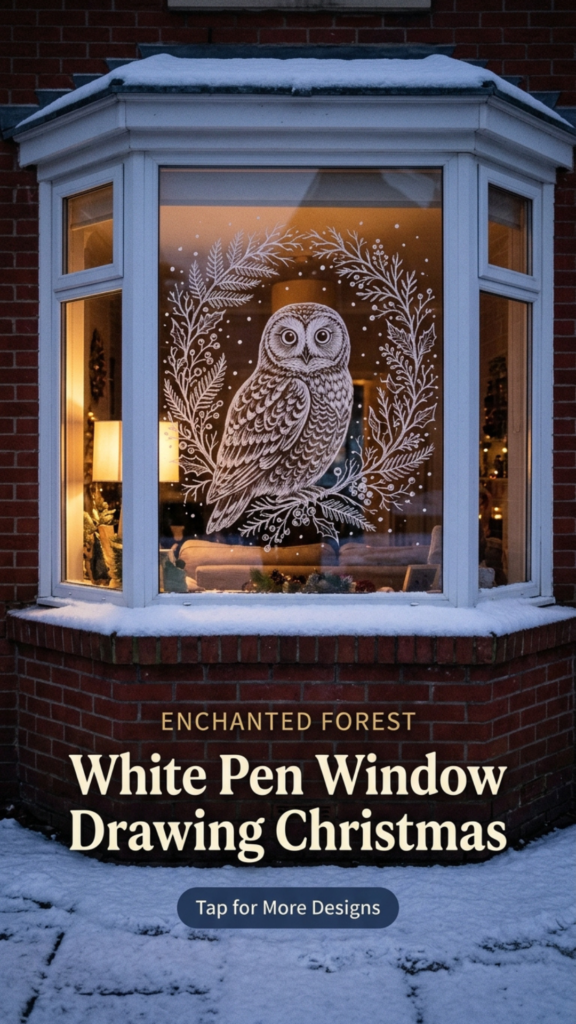
You’ll need a bold and a fine white chalk marker and a large bowl to trace. Clean the glass, then sketch a tall egg shape about 30 cm high for the owl’s body with the bold marker. Add a slightly wider rounded head on top so the total height is about 40 cm, with no neck between them. Draw two large circles for the eyes, with a smaller circle inside each and a solid dot in the center, leaving a tiny clear highlight. Add a small downward-pointing triangle between the eyes for the beak, and draw short lines radiating out from each eye to form the face. Switch to the fine marker and fill the chest with rows of small U shapes, like fish scales, starting small at the top and getting larger toward the bottom. Draw a long curved wing on each side with layered feather lines pointing downward. Add a horizontal branch under the owl with two small feet gripping it. Next, hold the bowl around the owl and trace a faint circle as your wreath guide. Build the wreath along this line with fern sprigs (a center line with tiny dashes on each side), leafy branches, small berry clusters and single leaves, letting some pieces stick out past the circle. Leave small gaps between sprigs so the wreath looks lacy rather than solid. Finish with snow dots of different sizes scattered all around the design.
8. Victorian Lantern with Swirls and Holly
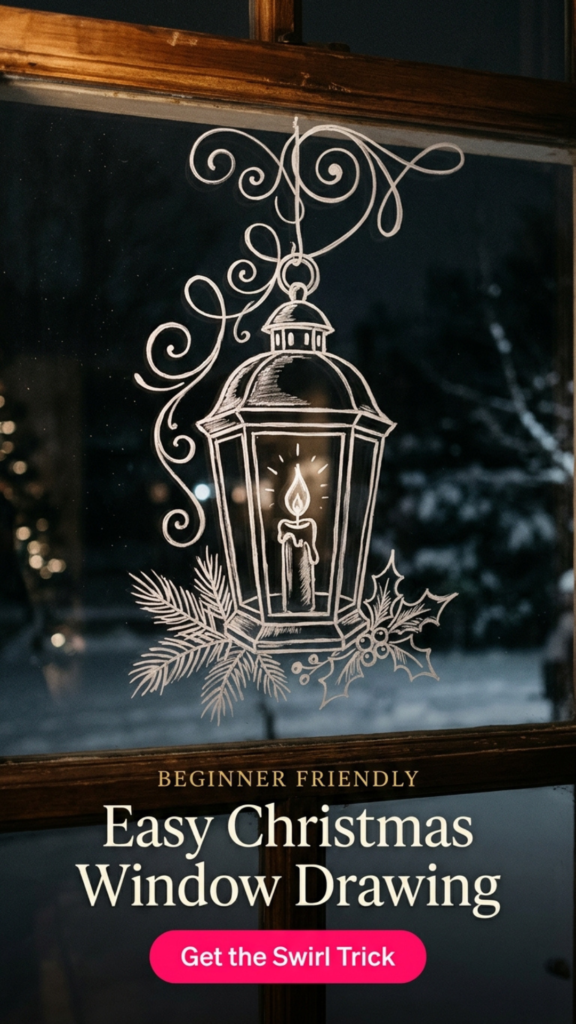
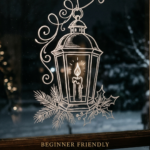
You’ll need a bold and a fine white chalk marker and a ruler. Clean the glass, then decide where the lantern will hang, usually the lower half of one pane, so the swirls can loop up into the corner above it. Draw the roof first as a small trapezoid that’s wider at the bottom, then add a little ball finial and a ring on top. Below the roof, use the ruler to draw a tall rectangle about 25 cm high, tapering it in slightly at the bottom. Add a second line just inside each edge to create the metal frame, a small scalloped trim under the roof and a narrow base at the bottom. Inside the lantern, draw a slim candle with three or four drips running down from the top edge, a teardrop-shaped flame and short lines radiating out around the flame for the glow. Next, from the ring on top, draw two or three big, loose S-shaped curves that loop up and out into the corner of the window, ending each one in a spiral. Draw each swirl quickly in one smooth motion, since fast strokes stay smoother than slow ones. Add a smaller swirl or two branching off the main ones. Finally, switch to the fine marker and draw pine sprigs (a stem with short needle strokes) and two or three pointed holly leaves with berry dots around the base of the lantern.
9. Let It Snow Snow Globe
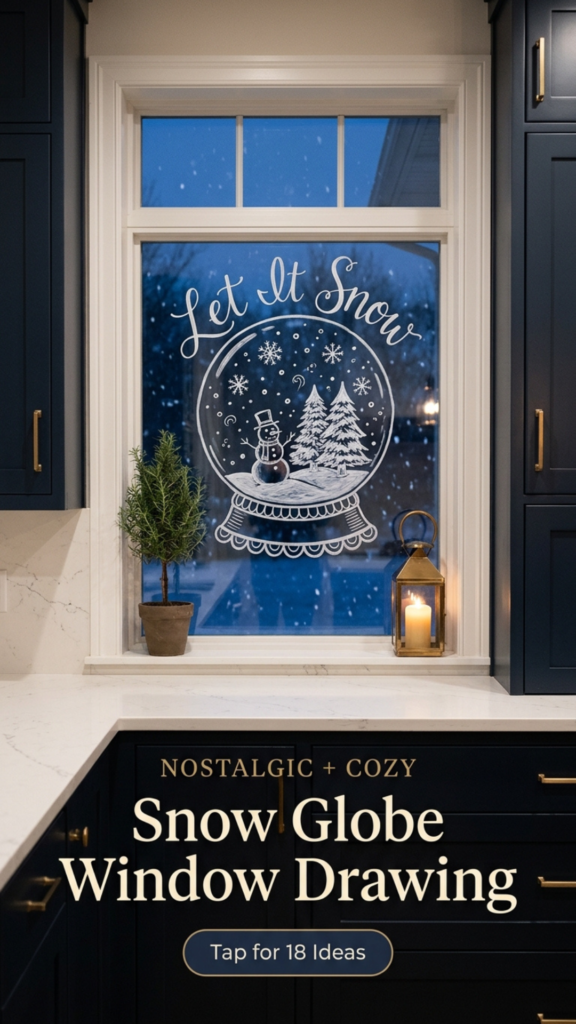
You’ll need a bold and a fine white chalk marker and a large dinner plate. Clean the glass, then trace the plate in the center of the pane, leaving about 15 cm of space above it for lettering. Under the globe, draw a wide base that’s broader at the bottom, then add a rope or scalloped band across its middle. Inside the globe, draw a gentle curved line across the bottom third for a snowy hill. On the hill, draw two small pine trees as stacked, slightly drooping triangles, and thicken the top of each layer with white for snow. Beside them, draw a little snowman with two stacked circles, a top hat, a scarf, dot eyes and stick arms. Switch to the fine marker and fill the globe with snowflakes and dots of different sizes, keeping a few larger snowflakes near the top. Draw one thin curved line just inside the top left edge of the globe to make it look like glass. For the lettering, draw a faint arch above the globe as a guide. Write “let” in script on the left side of the arch, “IT” in tall, bold capitals in the center and “snow” in script on the right, following the curve. Add three or four short rays on each side of “IT”, then wipe away the guide arch with a damp swab once the lettering is dry.
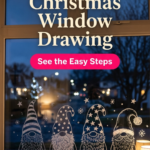
10. Gnome Trio with Striped Hats

You’ll need a bold and a fine white chalk marker and painter’s tape. Clean the glass, then run a strip of painter’s tape along the bottom of the window as a baseline so all your gnomes stand on the same line. Plan three or four gnomes spaced evenly across the glass. With the bold marker, draw a tall triangle hat for each one, varying the heights from about 25 to 45 cm, and bend the tips of one or two hats over to the side for personality. Draw a band across the bottom of each hat for the brim. Just under each brim, draw a round nose that slightly overlaps it. From under the nose, draw a large U or W shape for the beard, extending down toward the baseline. Fill each beard with long, wavy lines running from top to bottom, letting them flow in slightly different directions. Add two small oval feet peeking out from under each beard, resting on the tape line. Now switch to the fine marker and give every hat its own pattern: horizontal stripes on one, polka dots on another, little stars on the third and a pom-pom on the tip of the fourth. Let the marker dry for 10 minutes, then peel off the tape slowly. If you want to add more, draw a few snowflakes and dots floating above the gnomes.
11. Cozy Cocoa Folk Scene
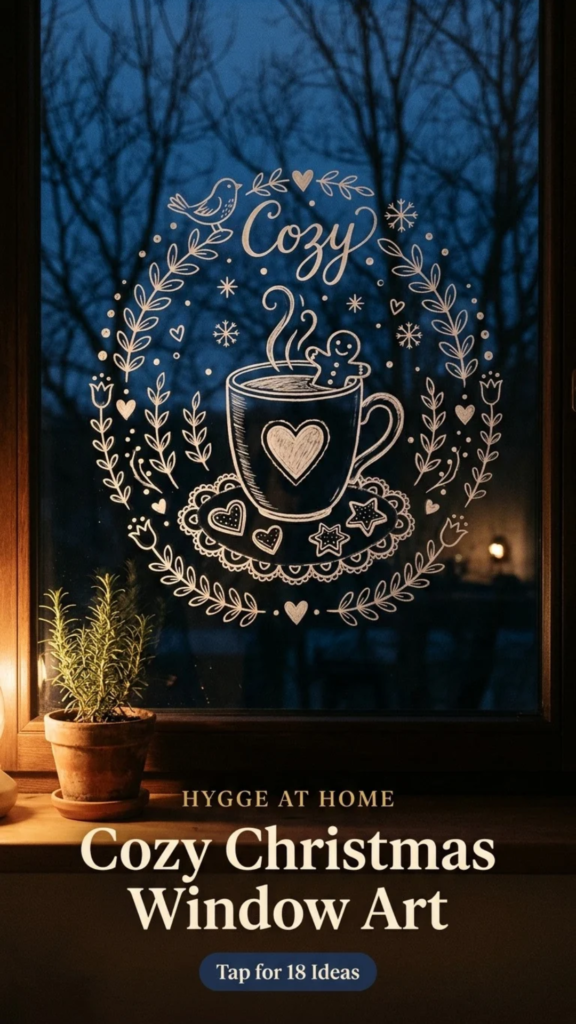
You’ll need a bold and a fine white chalk marker and a small bowl to trace. Clean the glass, then trace a wide half circle along the bottom of your design area for the doily. Draw a scalloped edge all the way around the curve, then add a ring of tiny dots just inside the scallops. On the doily, draw a wide mug about 25 cm tall with a curved handle, and add a heart on the front with short lines radiating out from it. Draw a gingerbread man peeking over the rim of the mug with a round head, dot eyes, a smile, a line of icing across his forehead and two little arms resting on the rim. Add three wavy steam lines rising from the mug. Beside the mug, draw two heart cookies and a star cookie, then use the fine marker to draw a dotted icing line just inside each cookie’s edge and a small heart in the center of each. Around the whole scene, draw leafy sprigs, little tulips, tiny hearts and snowflakes in a loose wreath shape, adding dotted lines along the stems. At the top, write “Cozy” in an elegant script, and draw a small bird perched on a sprig beside it. Finish by adding extra dots wherever the design feels empty, since dotted details are the signature of Scandinavian folk art.
My minimalist Christmas window painting ideas use only white paint for bare branches, moons, pines and a frosted frame.
How to Paint Your Windows for Christmas (Step by Step)
Window painting and drawing are forgiving, because everything wipes away until it’s dry. Follow these steps and your design will go on smoothly and stay put all season.
How to paint Christmas windows
- Clean the glass twice. Use glass cleaner, then wipe again with a dry microfiber cloth. Any film or fingerprints make paint bead and streak.
- Mask the frame. Run painter’s tape along the trim and grids so paint never touches wood or vinyl.
- Tape a printed design to the outside. Print your design, tape it to the outside of the glass facing in, and trace it from the inside. No freehand drawing needed.
- Paint light colors first, then dark. Fill white and pale areas first, let them dry for about 20 minutes, then add reds, greens and outlines on top. Thin layers dry faster and peel less.
- Add faux snow and details last. Spray snow in short bursts from about 30 cm away, then finish with dots, highlights and lettering.
Paint the inside of the glass whenever you can. It stays put through rain, snow and freezing temperatures, and you can reach it without a ladder. Letter words backwards on the inside only if they need to read correctly from the street.

5 Ways to Use Christmas Lights Inside the Window
Christmas lights inside the window are one of the biggest searches in this trend, and for good reason: they glow for you indoors and light up the street outside at the same time.
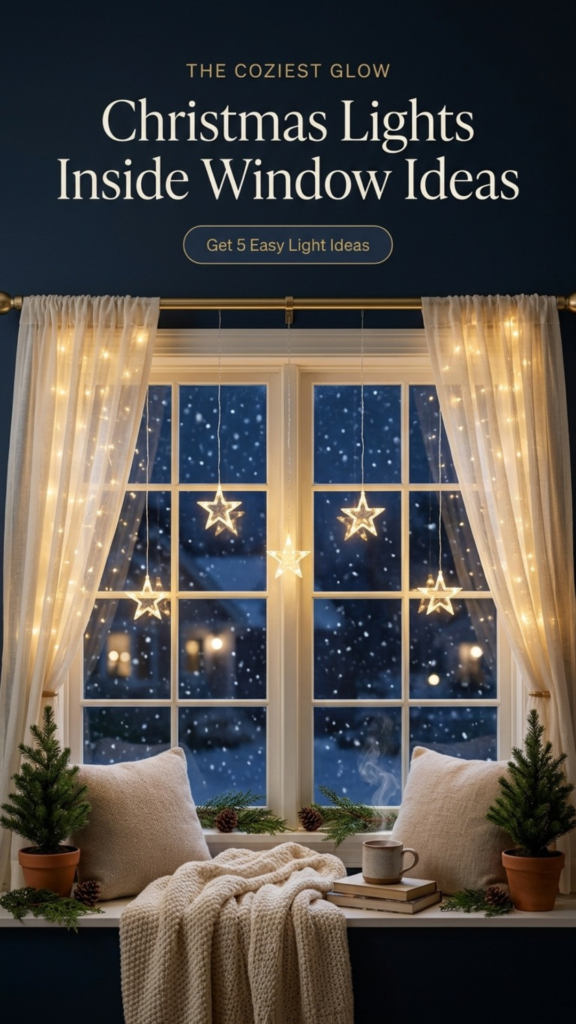
12Curtain Fairy Lights Behind Sheer Panels
Hang a curtain of warm white fairy lights from the top of the frame with clear adhesive hooks, then let sheer curtains fall in front. The fabric diffuses the light into a soft, dreamy glow. It’s the most beginner-friendly way to hang Christmas lights inside a window, and it looks expensive.
13Outline the Window Frame
For a classic Christmas window lights look, run one strand of warm white or multicolor lights around the inside edge of the frame. Clear adhesive clips spaced about every 30 cm keep the line crisp, and the outline frames any painted design beautifully.
14Hanging Star and Snowflake Lights
Hang three to five LED star lights at different heights from a tension rod or curtain rod with clear fishing line. Staggered heights look more natural than a straight row. Paper star lanterns with a battery tealight give a softer Scandinavian feel.
15Classic Window Candles
Electric window candles are the most traditional Christmas window decoration there is, and they’re lovely in every front window of the house. Choose a set with a 6-hour timer so they glow every evening on their own. If you love real candlelight elsewhere, my complete candle making guide shows you how to make your own. Just keep real flames away from curtains and sills.
16Bay Window Christmas Lights
A bay window is a ready-made stage. Outline each section with lights, draw or paint a wreath on the center pane, and fill the seat or sill with a small tree, lanterns and wrapped boxes. It’s the first window people see from the street, so make it the brightest one in the house.
The Window Lights I Recommend
Curtain fairy lights, window candles, star lights and the clips that hang them without a single nail.
SHOP THE LIGHTSChristmas Window Decorations With Lights: 2 Combo Looks
This is where the magic happens. Layering a painted or drawn design with real lights gives your window depth during the day and a full glow at night.
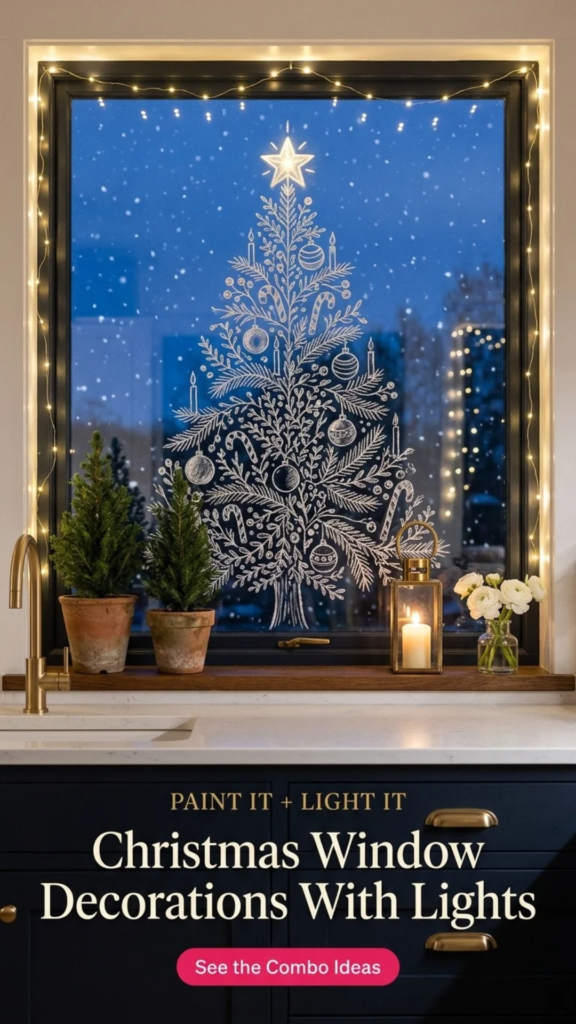
17White Drawing Under Real Lights
Draw any of the white designs above, then run real warm white lights across the top of the frame or hang curtain lights a few centimeters behind the glass. At night the light catches every white line, and the drawing glows like etched crystal.
18The Christmas Windowsill Vignette
Finish any window with a styled sill: evergreen garland with micro fairy lights tucked in, two potted mini pines, a lantern and a few handmade ornaments. If you’ve made any of my air dry clay Christmas ornaments, the sill is the perfect place to show them off.
Keep Christmas kitchen window decorations small and practical: the cozy cocoa drawing on one pane, a short strand of battery fairy lights on the sill and fresh rosemary in a pot. Nothing gets splashed while you cook.
How to Remove Window Paint (Without Scrubbing All Day)
Come January, your windows come clean in minutes. Lay an old towel along the sill before you start, because the runoff can stain wood.
How to remove window paint easily
- Chalk markers: spray with warm water, let it soak for one minute, then wipe with a damp microfiber cloth and finish with glass cleaner.
- Washable window paint or tempera: spray with warm water and a drop of dish soap, then lift the paint with a plastic razor scraper held at a low angle.
- Faux snow spray: most of it wipes off dry, and glass cleaner takes care of the haze.
- Stubborn spots: a little rubbing alcohol on a cloth breaks down the last film.
Christmas Window Light Safety Tips
Before you plug anything in
- Use LED lights inside. They stay cool near curtains and paper decor.
- Never pinch cords in a closed window. Use an outdoor-rated extension cord through a proper outlet.
- Use outdoor-rated lights outside only. Check the box label first.
- Use clips, not nails or staples. They protect the trim and the wire.
- Put everything on a timer. Lights aren’t left on overnight.
- Keep real flames off sills. Choose battery candles near curtains.
Turn Christmas Window Painting into Holiday Side Income
Once you’ve painted your own windows, you have a portfolio. Cafes, salons, boutiques and small businesses pay window painters every November and December for Christmas shop window painting, and many book the same artist again every year.
How to get paid to paint shop windows
- Start with your own photos. Snap your finished windows in daylight and at night.
- Offer 2 or 3 simple packages: a small corner design, a half window and a full scene.
- Paint the outside of shop glass so the design reads from the street, and use weather-resistant window paint.
- Pitch in early November with a photo and a simple price list.

20 Digital Product Ideas for Multi-Passionate Creators
Love turning creative skills into income? Grab my free guide and discover ways to keep earning from what you make long after the holidays.
Christmas Window Decorations FAQ
Here are the questions I get asked most about painting and lighting windows for Christmas.
QWhat is the best marker for Christmas window drawing?
A white liquid chalk marker. Use a bold tip for outlines and a fine tip for details. It goes on bright, dries quickly and wipes off with water.
QShould I paint the inside or outside of the window?
Paint the inside for durability and easy reach. Paint the outside, or letter in reverse on the inside, only when words need to read from the street.
QWill window paint damage my windows?
Not on smooth, sealed glass. Test a small spot first on frosted, etched or low-E coated glass, since some markers can stain those surfaces.
QHow do you hang Christmas lights inside a window without nails?
Use clear adhesive light clips, removable hooks, suction cup hooks or a tension rod. All of them come down without marking the trim.
QI can’t draw. Can I still do this?
Yes. Print your design, tape it to the outside of the glass facing in, and trace it from the inside. Gnomes, swirls and snowflakes are the most forgiving designs to start with.
QWhen should I put up Christmas window decorations?
Most people decorate from American Thanksgiving through early December. Window paint holds up all season, so you can start as early as mid-November.
Final Thoughts
Your windows are the easiest place to make the whole house feel like Christmas. Pick one design and one lighting idea, give yourself a cozy afternoon, and you’ll be amazed at how magical it looks the first night the lights come on. For more holiday DIY, see my Christmas gift wrapping ideas and handmade Christmas gifts.
Save this for decorating day. Pin it to your Christmas board so every design is in one place when you’re ready to paint.
Jennifer Dawn