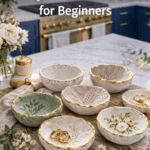

There is something deeply satisfying about taking a simple piece of clay and turning it into something beautiful, useful, and surprisingly professional-looking with your own hands. If you have been craving a creative hobby that feels calming, tactile, and genuinely rewarding, clay crafting might be one of the best places to start. The lovely twist is that many of the most beautiful projects are not difficult at all. In fact, some of the most eye-catching clay crafts are surprisingly easy to make, even if you are a complete beginner.
Affiliate disclaimer: This post may contain affiliate links, which means I may earn a small commission if you shop through them at no extra cost to you. I only share tools and materials I would truly use for my own creative projects.
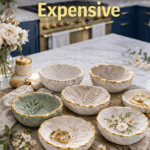
A lot of people assume clay crafting requires expensive supplies, advanced sculpting skills, or a studio setup that looks like a pottery fairy moved in and paid rent in glazes. Thankfully, that is not true. With a few simple tools like texture rollers, clay cutters, stamps, and some beginner-friendly finishing techniques, you can create handmade pieces that look polished, artistic, and even sellable from your own kitchen table.
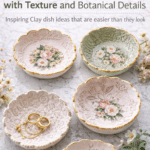
Whether you want to make clay crafts for your home, thoughtful gifts, creative products for your shop, or just enjoy an easy and relaxing hobby, there are so many beautiful directions you can take. In this post, I am sharing creative clay crafts that are beginner-friendly, highly customizable, and much easier to make than they look. I am also going deeper into how to decorate and finish them using simple tools and embellishment techniques like stamping, transfers, decoupage, and texture rolling.
Why Clay Crafts Are So Popular Right Now
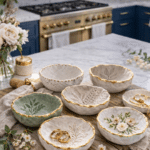
Clay crafts have become incredibly popular because they hit that sweet spot between creativity and practicality. They are relaxing to make, affordable to start, and versatile enough to fit almost any style. You can create pieces that feel modern, earthy, whimsical, floral, rustic, moody, or feminine depending on your color palette and finishing details.
They are also one of the few hobbies where the finished result can actually be useful. Instead of ending up with random practice pieces that sit in a drawer, you can make dishes, magnets, coasters, ornaments, trays, wall art, jewelry, gift tags, plant markers, and home decor that you will genuinely want to use or give away.
Another reason easy clay crafts are so appealing is the amount of creative freedom you have without needing advanced skills. Simple shapes can be transformed with the right surface details. A plain round magnet becomes boutique-worthy with a floral stamp. A basic tray looks elevated with a texture roller. A simple ornament turns into something special with a transfer or delicate decoupage finish.
Basic Clay Tools That Make a Big Difference
You do not need every tool under the sun, but a few simple extras can take your projects from basic to beautiful without making them harder.
Texture rollers
Texture rollers are one of the easiest ways to make clay crafts look more detailed. You simply roll them over flattened clay to imprint a repeating pattern across the surface. These patterns can be floral, lace-inspired, geometric, botanical, celestial, woodgrain, or vintage. They are especially useful when you want a consistent, professional-looking texture across trays, ornaments, coasters, magnets, and wall tiles.
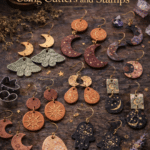
Clay cutters
Clay cutters help you create neat, repeatable shapes with very little effort. These can be circles, arches, daisies, mushrooms, moons, hearts, scallops, bows, hexagons, and more. They are especially helpful for earrings, magnets, ornaments, and garland pieces because they give your projects a clean, polished shape right from the start.
Stamps
Clay stamps can add words, botanical details, moon phases, floral patterns, mandalas, initials, and decorative motifs. Some stamps are deep and bold, while others create delicate impressions. You can stamp directly into rolled clay before drying or baking, then leave the impression plain or highlight it later with paint, wax, or a Rub ’n Buff style finish.
Transfers
Transfers are perfect when you want a highly decorative surface without hand-painting every detail. Depending on the type you use, transfers can add floral artwork, vintage designs, labels, illustrations, or delicate patterns onto your clay surface. They work especially well on trays, wall tiles, magnets, ornaments, and decorative plaques.
Decoupage
Decoupage is another wonderful beginner-friendly embellishment technique. It lets you apply patterned paper, tissue, napkins, rice paper, or printed designs onto finished clay surfaces using a decoupage medium. This is ideal for makers who want to create clay pieces with floral prints, vintage illustrations, labels, botanical art, or cottage-style details without painting them by hand.
Before You Start: A Few Helpful Basics
No matter what project you are making, the process becomes smoother when you keep a few things in mind.
First, condition or soften your clay properly. If you are using polymer clay, knead it until it is pliable. If you are using air dry clay, make sure it is workable and not beginning to dry out around the edges.
Second, roll your clay to an even thickness. This helps prevent weak spots, cracking, and warping. Many crafters use guide sticks or acrylic rolling guides for consistency.
Third, work on a smooth surface that allows you to lift your clay pieces cleanly. Parchment paper, a ceramic tile, or a nonstick craft mat can help.
Fourth, add any holes, slits, or hardware spaces before drying or baking. Trying to do that afterward is usually where the chaos goblin enters.
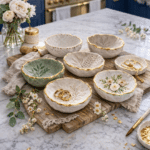
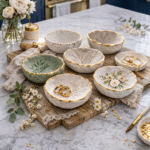
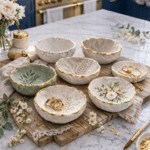
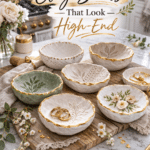
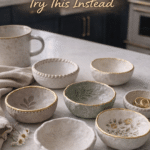
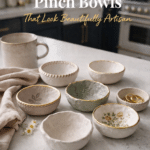
1. Pinch Bowls That Look Handmade in the Best Way
Pinch bowls are one of the easiest beginner clay crafts, but they can still look artistic and high-end when finished thoughtfully. Start by rolling a ball of clay, pressing your thumb into the center, and gently pinching while rotating the bowl in your hand.
To make them more decorative, you can do a few things:
Use a small stamp around the outer edge for a border detail.
Roll the clay lightly with a texture roller before forming the bowl if you want the outside surface to have pattern.
Press lace, linen, or a leaf into the surface for a soft natural imprint.
Add a transfer inside the bowl once it is dry for a hidden floral or botanical moment.
You can leave the bowl matte and natural, paint it in a soft neutral tone, or add gold edging for a more finished look. These work beautifully as ring dishes, tea bag holders, money bowls, or little catchalls on a nightstand.

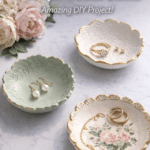
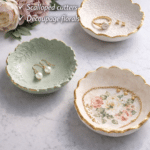
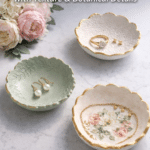
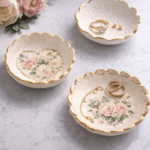
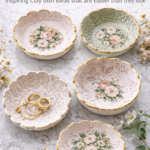
2. Jewelry Dishes with Texture and Botanical Details
A simple clay jewelry dish can go from cute to genuinely beautiful with very little extra effort. Roll out your clay evenly, then use a bowl, cup, or paper template to cut out your shape.
For more detail, try one of these techniques:
Roll the slab with a floral or lace texture roller before cutting your dish shape.
Use scalloped clay cutters for a more decorative outline.
Stamp a repeating pattern around the edge before gently shaping it over a bowl.
Apply a transfer to the center of the dish after it dries for a pretty focal point.
Use decoupage with floral tissue paper or vintage paper fragments for a layered, romantic finish.
If you want a soft handmade boutique style, use chalky or matte paint finishes in cream, blush, sage, stone, or muted blue. A little metallic wax around the rim can make the whole piece feel extra lovely.

3. Clay Magnets That Are Small but Mighty
Clay magnets are one of the easiest projects to batch create, and they are perfect for using cutters, stamps, and transfers. Start by rolling out your clay to an even thickness. Then use small clay cutters to create shapes like flowers, circles, mushrooms, moons, hearts, stars, or fruits.
To decorate them:
Use mini stamps for floral details, initials, celestial motifs, or tiny patterns.
Add texture with rollers before cutting the shapes.
Apply a transfer for detailed designs like wildflowers, butterflies, herbs, or vintage labels.
Use decoupage for patterned paper magnets with a cottagecore or whimsical vibe.
Paint details by hand after drying or baking, then seal and glue a magnet to the back.
These are wonderful if you want easy clay crafts that can also become products to sell. Because they are small, they are perfect for experimenting with multiple finishes and styles without committing to a giant project.
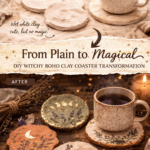
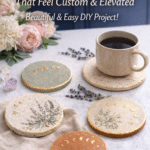
4. Textured Coasters That Feel Custom and Elevated
Clay coasters are ideal for texture rollers because the larger surface really lets the pattern shine. Roll your clay to a consistent thickness and cut circles, arches, hexagons, or organic pebble shapes.
Then choose how you want to decorate them:
Use a texture roller across the entire surface for a cohesive pattern.
Stamp a border around the edge for a framed look.
Add a central transfer motif like a botanical illustration or vintage floral image.
Use decoupage with torn paper edges for a layered mixed-media look.
Create a faux stone or terrazzo finish with paint and speckling.
Once they are dry or baked, seal them well if they will be used under cups or glasses. These make beautiful gifts and are especially pretty in neutral or earthy color palettes.

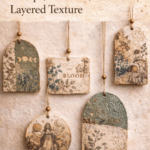
5. Wall Hanging Tiles with Stamps, Transfers, and Layered Texture
Clay wall tiles are one of the best projects for mixing techniques together. Start with rolled clay cut into arches, circles, rectangles, or freeform tile shapes.
From there, you can build visual interest in so many easy ways:
Use a texture roller over the whole slab before cutting.
Press in stamps with moon phases, florals, vines, mandalas, mushrooms, or words.
Apply a transfer to part of the tile for a layered art-piece feel.
Use decoupage with torn botanical paper and then add paint or wax over top for an aged finish.
Combine plain sections with textured sections so the piece feels more intentional and balanced.
Add hanging holes before drying, then string several tiles together with ribbon, twine, or beads. These pieces can look incredibly artistic without requiring complicated sculpting at all.

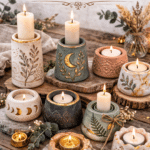
6. Candle Holders with Subtle Surface Design
Simple candle holders are beautiful on their own, but texture and stamping can make them feel much more custom. Form a stable base for a taper candle or tealight and smooth everything carefully.
Then add detail with one or two techniques:
Stamp a simple repeating design around the base.
Use a texture roller only on the sides and leave the top smooth.
Apply a delicate transfer once the piece is dry if the surface shape allows for it.
Use dry brushing or wax to highlight stamped or textured areas.
For a softer, modern finish, keep the color palette muted. For something moodier, deeper tones with gold accents can feel very striking.

7. Botanical Ornaments and Gift Tags with Added Layers
Botanical imprint ornaments are already beautiful, but you can absolutely take them further. After pressing leaves, herbs, or flowers into your clay, you can enhance them in several ways.
Stamp small details around the edges for a framed effect.
Use texture rollers only on the border, leaving the center for the botanical print.
Apply a transfer to the back side if you want a double-sided ornament.
Decoupage a tiny cutout label, word, or illustration onto the finished piece.
Brush metallic paint lightly over the raised areas to make the pattern stand out.
These are lovely for seasonal decor, gift toppers, weddings, garden lovers, and handmade packaging details.
8. Beginner Clay Earrings Using Cutters and Stamps
Clay earrings become dramatically easier when you let cutters do the hard part. Start with well-conditioned polymer clay rolled evenly, then use cutters to create arches, circles, flowers, bows, leaves, half moons, or layered geometric shapes.
To decorate them without overcomplicating the process:
Use texture rollers on the slab before cutting to create an all-over pattern.
Stamp tiny details into plain pieces before baking.
Apply transfers designed for polymer clay or use compatible surface techniques.
Use decoupage-style effects carefully on flat statement pieces if the materials and sealers are appropriate.
Create marbled clay, terrazzo clay, or speckled clay before cutting shapes.
After baking, assemble with jump rings and posts or hooks. Even very simple shapes can look beautiful when the texture or pattern is doing the visual work.

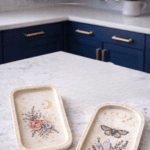
9. Decorative Trays with Transfers and Decoupage
Clay trays are one of the absolute best projects for transfers and decoupage because they give you more surface area to play with. Start with a rectangle, oval, cloud, scalloped, or freeform tray shape.
Then decorate it using one of these approaches:
Use a subtle texture roller over the base for a soft embossed look.
Add a floral transfer to the center.
Decoupage torn rice paper or decorative napkin pieces onto the flat base.
Stamp a border around the outer edge before forming the sides.
Layer paint, transfer, and wax for a more vintage or artisan finish.
These are beautiful for vanities, coffee tables, entryways, and desk styling. They also look gorgeous in product photography, which makes them ideal for handmade shops.

10. Tiny Houses with Surface Pattern and Painted Details
Tiny clay houses are already charming, but texture makes them even sweeter. Form simple little house shapes, then add roof lines, windows, and doors.
To decorate them:
Use a fine stamp to add brick, woodgrain, florals, or tiny dot patterns.
Roll the roof section with a texture roller before attaching or defining it.
Apply a tiny transfer to the front like a floral vine or vintage motif.
Use decoupage paper for tiny faux wallpaper effects on the back or base.
Paint windows, doors, and roof details in a soft cottage palette.
This is a wonderful project if you love whimsical home decor or seasonal displays.

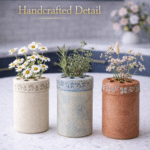
11. Flower Frogs and Herb Holders with Handcrafted Detail
A clay flower frog is simple and useful, but it can still feel special with a little surface design. Shape a rounded disk or dome, then poke evenly spaced holes.
Before it dries, you can:
Stamp a botanical motif between the holes.
Use a texture roller around the outer edge.
Add a transfer to the sides if the shape allows.
Paint and wax the finished piece to highlight its texture.
This is a lovely project for gardeners, flower lovers, or anyone drawn to pretty practical pieces.

12. Garland Pieces Made with Clay Cutters
Garlands are one of the easiest ways to use clay cutters in a very satisfying way. Use cutters for stars, bows, daisies, hearts, moons, leaves, or mushrooms, then add holes for stringing.
To make them more visually interesting:
Use texture rollers before cutting the shapes.
Stamp details into each piece for consistency.
Alternate plain shapes with transfer-decorated ones.
Decoupage only certain pieces in the sequence so the design feels layered and collected.
Once dry or baked, string them with beads, ribbon, or twine. These are especially beautiful as shelf decor, seasonal accents, or nursery decor.
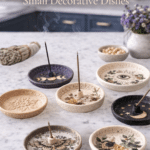
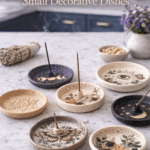
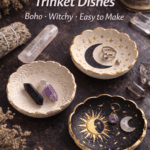
13. Incense Holders and Small Decorative Dishes
These pieces work beautifully with stamp details and transfer art. A small dish with a single incense hole can be plain and minimal, or it can become a lovely decorative piece with the right finish.
Try these ideas:
Stamp a moon phase or floral motif in the center.
Use a texture roller on the outer rim only.
Add a vintage-style transfer to the base.
Decoupage a torn botanical element into the dish and seal it.
This kind of project is ideal if you love calm, earthy decor with a handmade feel.

14. Picture Holders and Place Card Stands
These little pieces are great for makers who want a quick and easy project with a lot of charm. Shape a rounded or decorative base and add a slit or wire insert to hold a card or photo.
To make them prettier:
Use cutters for hearts, flowers, stars, bows, or arches.
Stamp words, initials, or tiny motifs into the surface.
Apply a transfer to the front for extra detail.
Use decoupage to create tiny vintage or floral fronts.
These are wonderful for weddings, dinner parties, small gifts, and shop products.
15. Faux Ceramic-Look Decor Using Texture and Finishing Techniques
One of the easiest ways to make beginner clay crafts look more expensive is to aim for a faux ceramic look. You do not need complicated forms. Simple shapes work beautifully when the finish is thoughtful.
Use these techniques:
Roll subtle texture into the clay before shaping.
Keep the form simple and organic.
Use matte paints in stone, white, beige, olive, black, or terracotta.
Highlight raised texture with dry brushing or wax.
Add a delicate transfer sparingly rather than covering the whole piece.
Use decoupage in a restrained way, such as a single botanical label or antique floral fragment.
This approach works well for bowls, trays, wall tiles, candle holders, ornaments, and dishes.
How to Use Transfers on Clay
Transfers can vary depending on the brand and type, but the general idea is simple. You apply the design to a smooth clay surface either before or after curing, depending on the product instructions.
A few helpful tips:
Choose flatter surfaces when you are first learning.
Make sure the clay surface is smooth and clean.
Burnish or apply carefully according to the transfer type.
Seal the finished piece if needed, especially if it will be handled often.
Transfers are wonderful when you want highly detailed flowers, labels, text, illustrations, or vintage-inspired art without hand-painting.

How to Use Decoupage on Clay
Decoupage is ideal for air dry clay and for decorative clay pieces that are not meant for food use. Once the clay piece is fully dry or baked and cooled, paint the base if desired and let it dry completely.
Then:
Cut or tear your paper element to size.
Brush on a thin layer of decoupage medium.
Place the paper gently and smooth it out.
Add another thin coat over top once dry enough to handle.
Seal again if needed for durability.
Decoupage works beautifully with floral napkins, rice paper, old book pages, labels, tissue paper, or printable vintage art.
Best Tips for Making Clay Crafts Look More Professional
Use even pressure when rolling
This helps your cutters, stamps, and rollers work more cleanly.
Test texture on scrap clay first
Some rollers and stamps create deeper impressions than others. A quick test can save a project.
Do surface design before cutting when possible
Texture rollers often work best on a larger slab before you cut your final shapes.
Keep your embellishments balanced
A textured surface, a transfer, a stamp, and heavy paint all at once can get busy. Usually one or two focal techniques are enough.
Seal when appropriate
If you are using transfers or decoupage, sealing can protect the surface and make the finish feel more complete.
Let pieces dry or cure fully
Trying to paint, seal, or embellish too soon can lead to smudges, peeling, or warping.
What Supplies You Need
A simple beginner setup might include:
Air dry clay or polymer clay
Rolling pin or acrylic roller
Guide sticks
Clay cutters
Texture rollers
Stamps
Craft knife
Small bowls or templates
Sandpaper
Acrylic paint
Paint brushes
Transfer sheets or clay-safe transfers
Decoupage medium
Decorative paper, napkins, or rice paper
Sealer
Glue for magnets or findings
You do not need everything on day one. Even starting with one texture roller, a few cutters, and a stamp set can open up a lot of creative options.
Air Dry Clay vs Polymer Clay for Decorative Techniques
Air dry clay is wonderful for trays, ornaments, dishes, wall hangings, and larger decor pieces. It is also a great choice for decoupage because the finished surface often takes paint and paper embellishments beautifully.
Polymer clay is excellent for earrings, charms, magnets, and smaller decorative items. It also works well with cutters and texture rollers. Some transfer methods are especially popular with polymer clay, so always follow the instructions for the specific materials you are using.
Clay Crafts That Make Great Gifts
If you want easy clay gift ideas, these are especially lovely:
Jewelry dishes
Coasters
Magnets
Candle holders
Botanical ornaments
Tiny trays
Garland pieces
Picture holders
Small wall tiles
Mini houses
Adding stamped initials, floral transfers, or decoupaged details can make a simple handmade gift feel extra personal.
Clay Crafts You Can Potentially Sell
If you are thinking about products, these are especially good options:
Magnets
Earrings
Jewelry dishes
Ornaments
Decorative trays
Coasters
Garland sets
Tiny houses
Place card holders
Botanical tiles
- Incense Burners
- Plant Pots
- Seasonal Decor
Using cutters, stamps, and texture rollers also helps create consistency across multiple pieces, which is helpful when you want to batch similar items for selling.
Final Thoughts on Creative Clay Crafts That Are Surprisingly Easy to Make
Clay crafting is one of those hobbies that can feel playful, calming, artistic, and productive all at once. You do not need advanced skills to make something beautiful. Often, all it takes is a simple shape, a good texture roller, a pretty stamp, or a delicate transfer to make a beginner project look far more detailed than it really is.
That is the magic of clay. It gives you room to experiment without demanding perfection. You can make something useful, something giftable, something beautiful for your home, or even something that grows into a small business idea. Start simple, play with texture, try a few cutters, test a stamp, add a transfer, decoupage a tray, and see what feels fun.
Sometimes the prettiest projects begin with the easiest steps.
FAQ About Easy Clay Crafts
What are the best clay tools for beginners?
Some of the most helpful beginner tools are clay cutters, texture rollers, stamps, a roller, a craft knife, and a few shaping bowls or templates. I also find these shaping tools extremely helpful.
Are texture rollers worth it for clay crafts?
Yes. Texture rollers are one of the easiest ways to make simple clay projects look more detailed and polished without requiring advanced sculpting skills.
Can you use decoupage on clay?
Yes, especially on decorative pieces. Decoupage works beautifully on dry or cured clay for trays, ornaments, plaques, and other non-food-use items.
Do transfers work on clay crafts?
Yes, many transfers work wonderfully on clay depending on the type of clay and the transfer product. Always follow the instructions for the specific transfer you are using.
What clay crafts are easiest to make and sell?
Magnets, earrings, ornaments, jewelry dishes, coasters, trays, and small decorative pieces are all great beginner-friendly options for selling.